


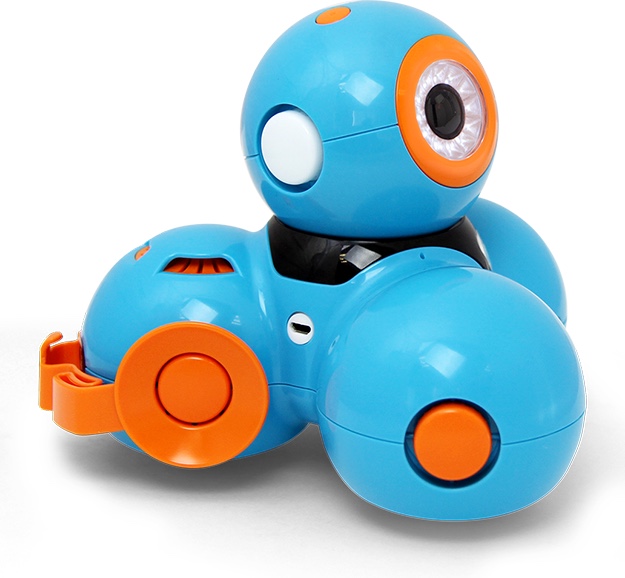
Set up your...
Follow these instructions to set up your accessories, and you'll get going in no time!


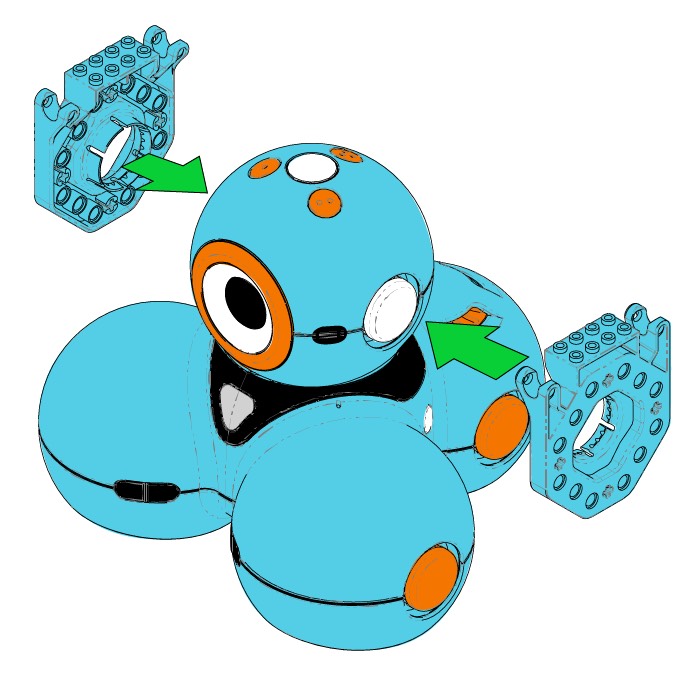
Building Brick Extensions
The play possibilities are endless! Transform Dash & Dot into anything you can imagine using your favorite building bricks, including LEGO®. Simply snap on and start building!
Set up for:
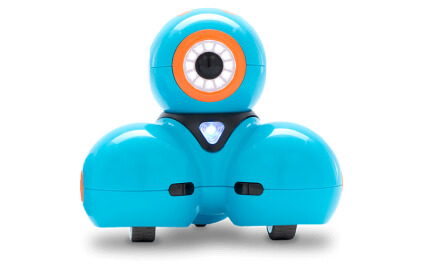
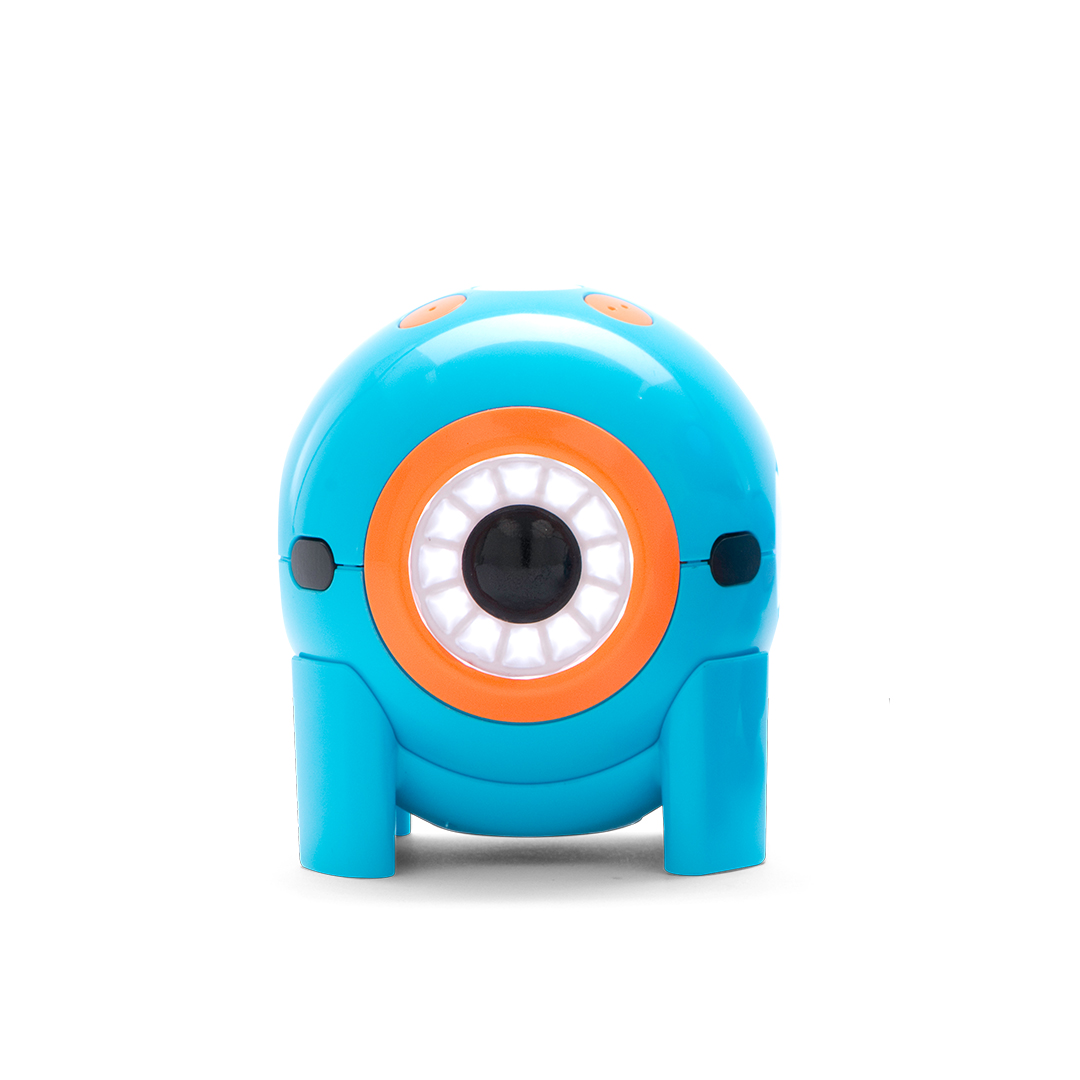
Dash
Dot
Step 1
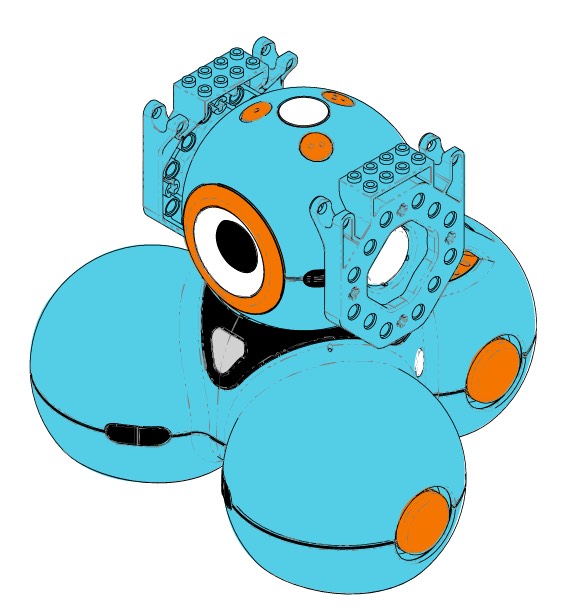
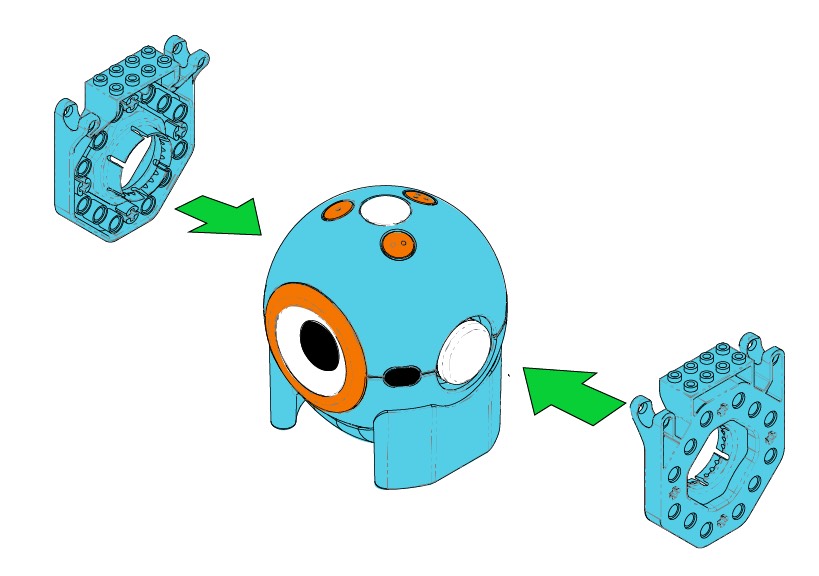
Building Brick Extensions can be snapped on to any of the 6 connection points on Dash’s head or body. First, line up your extension’s connector ring to the round connection point on your robot.
Step 2
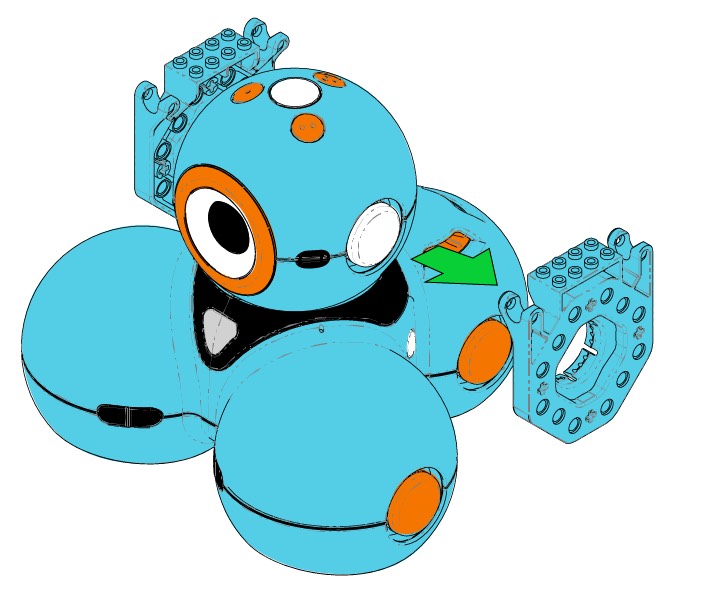
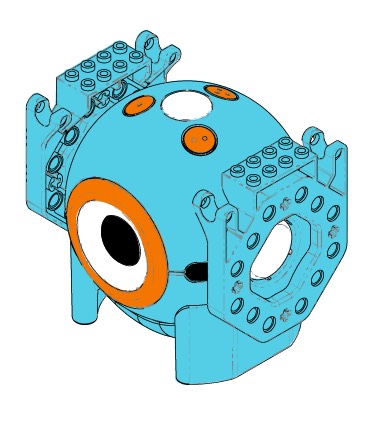
Press firmly until you hear a click to snap the extension into place. Building Brick Extensions can be rotated for additional building possibilities.
Step 3
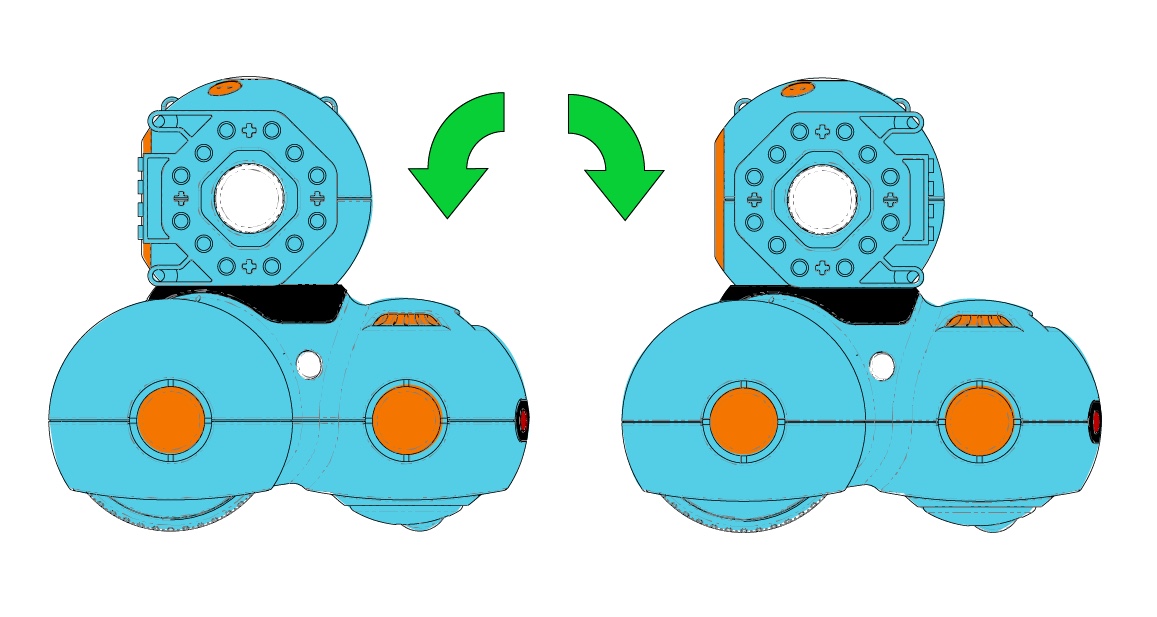
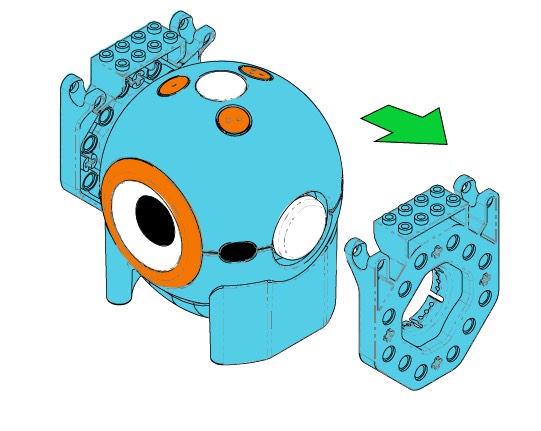
To rotate your Building Brick Extension, pull it straight out until it is disconnected. Then rotate as desired, and repeat Steps 1 and 2 to reconnect.
Step 4
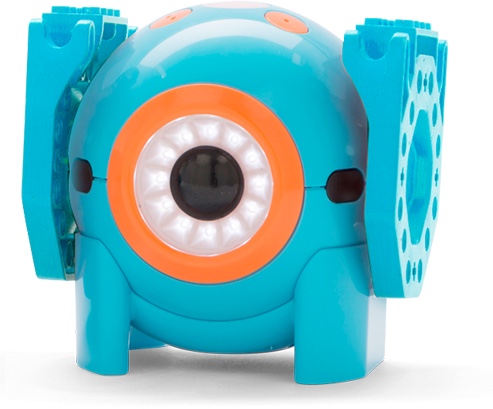
Building Brick Extensions can be connected at 90 or 45 degrees (i.e., straight up and down, forward, backwards, or diagonal). Rotate and snap them in to build and play!
Building Brick Extensions
The play possibilities are endless! Transform Dash & Dot into anything you can imagine using your favorite building bricks, including LEGO®. Simply snap on and start building!
Set up for:
Dash
Dot
Step 1
Building Brick Extensions can be snapped either side of Dot, or on the bottom. First, line up your extension’s connector ring to the round connection point on your robot. To use the bottom connector, remove Dot from stand.
Step 2
Press firmly until you hear a click to snap the extension into place. Building Brick Extensions can be rotated for more building possibilities.
Step 3
To rotate your Building Brick Extension, pull it straight out until it is disconnected. Then rotate as desired, and repeat Steps 1 and 2 to reconnect.
Step 4
Building Brick Extensions can be connected at 90 or 45 degrees (i.e., straight up and down, forward, backwards, or diagonal). Rotate and snap them in to build and play!

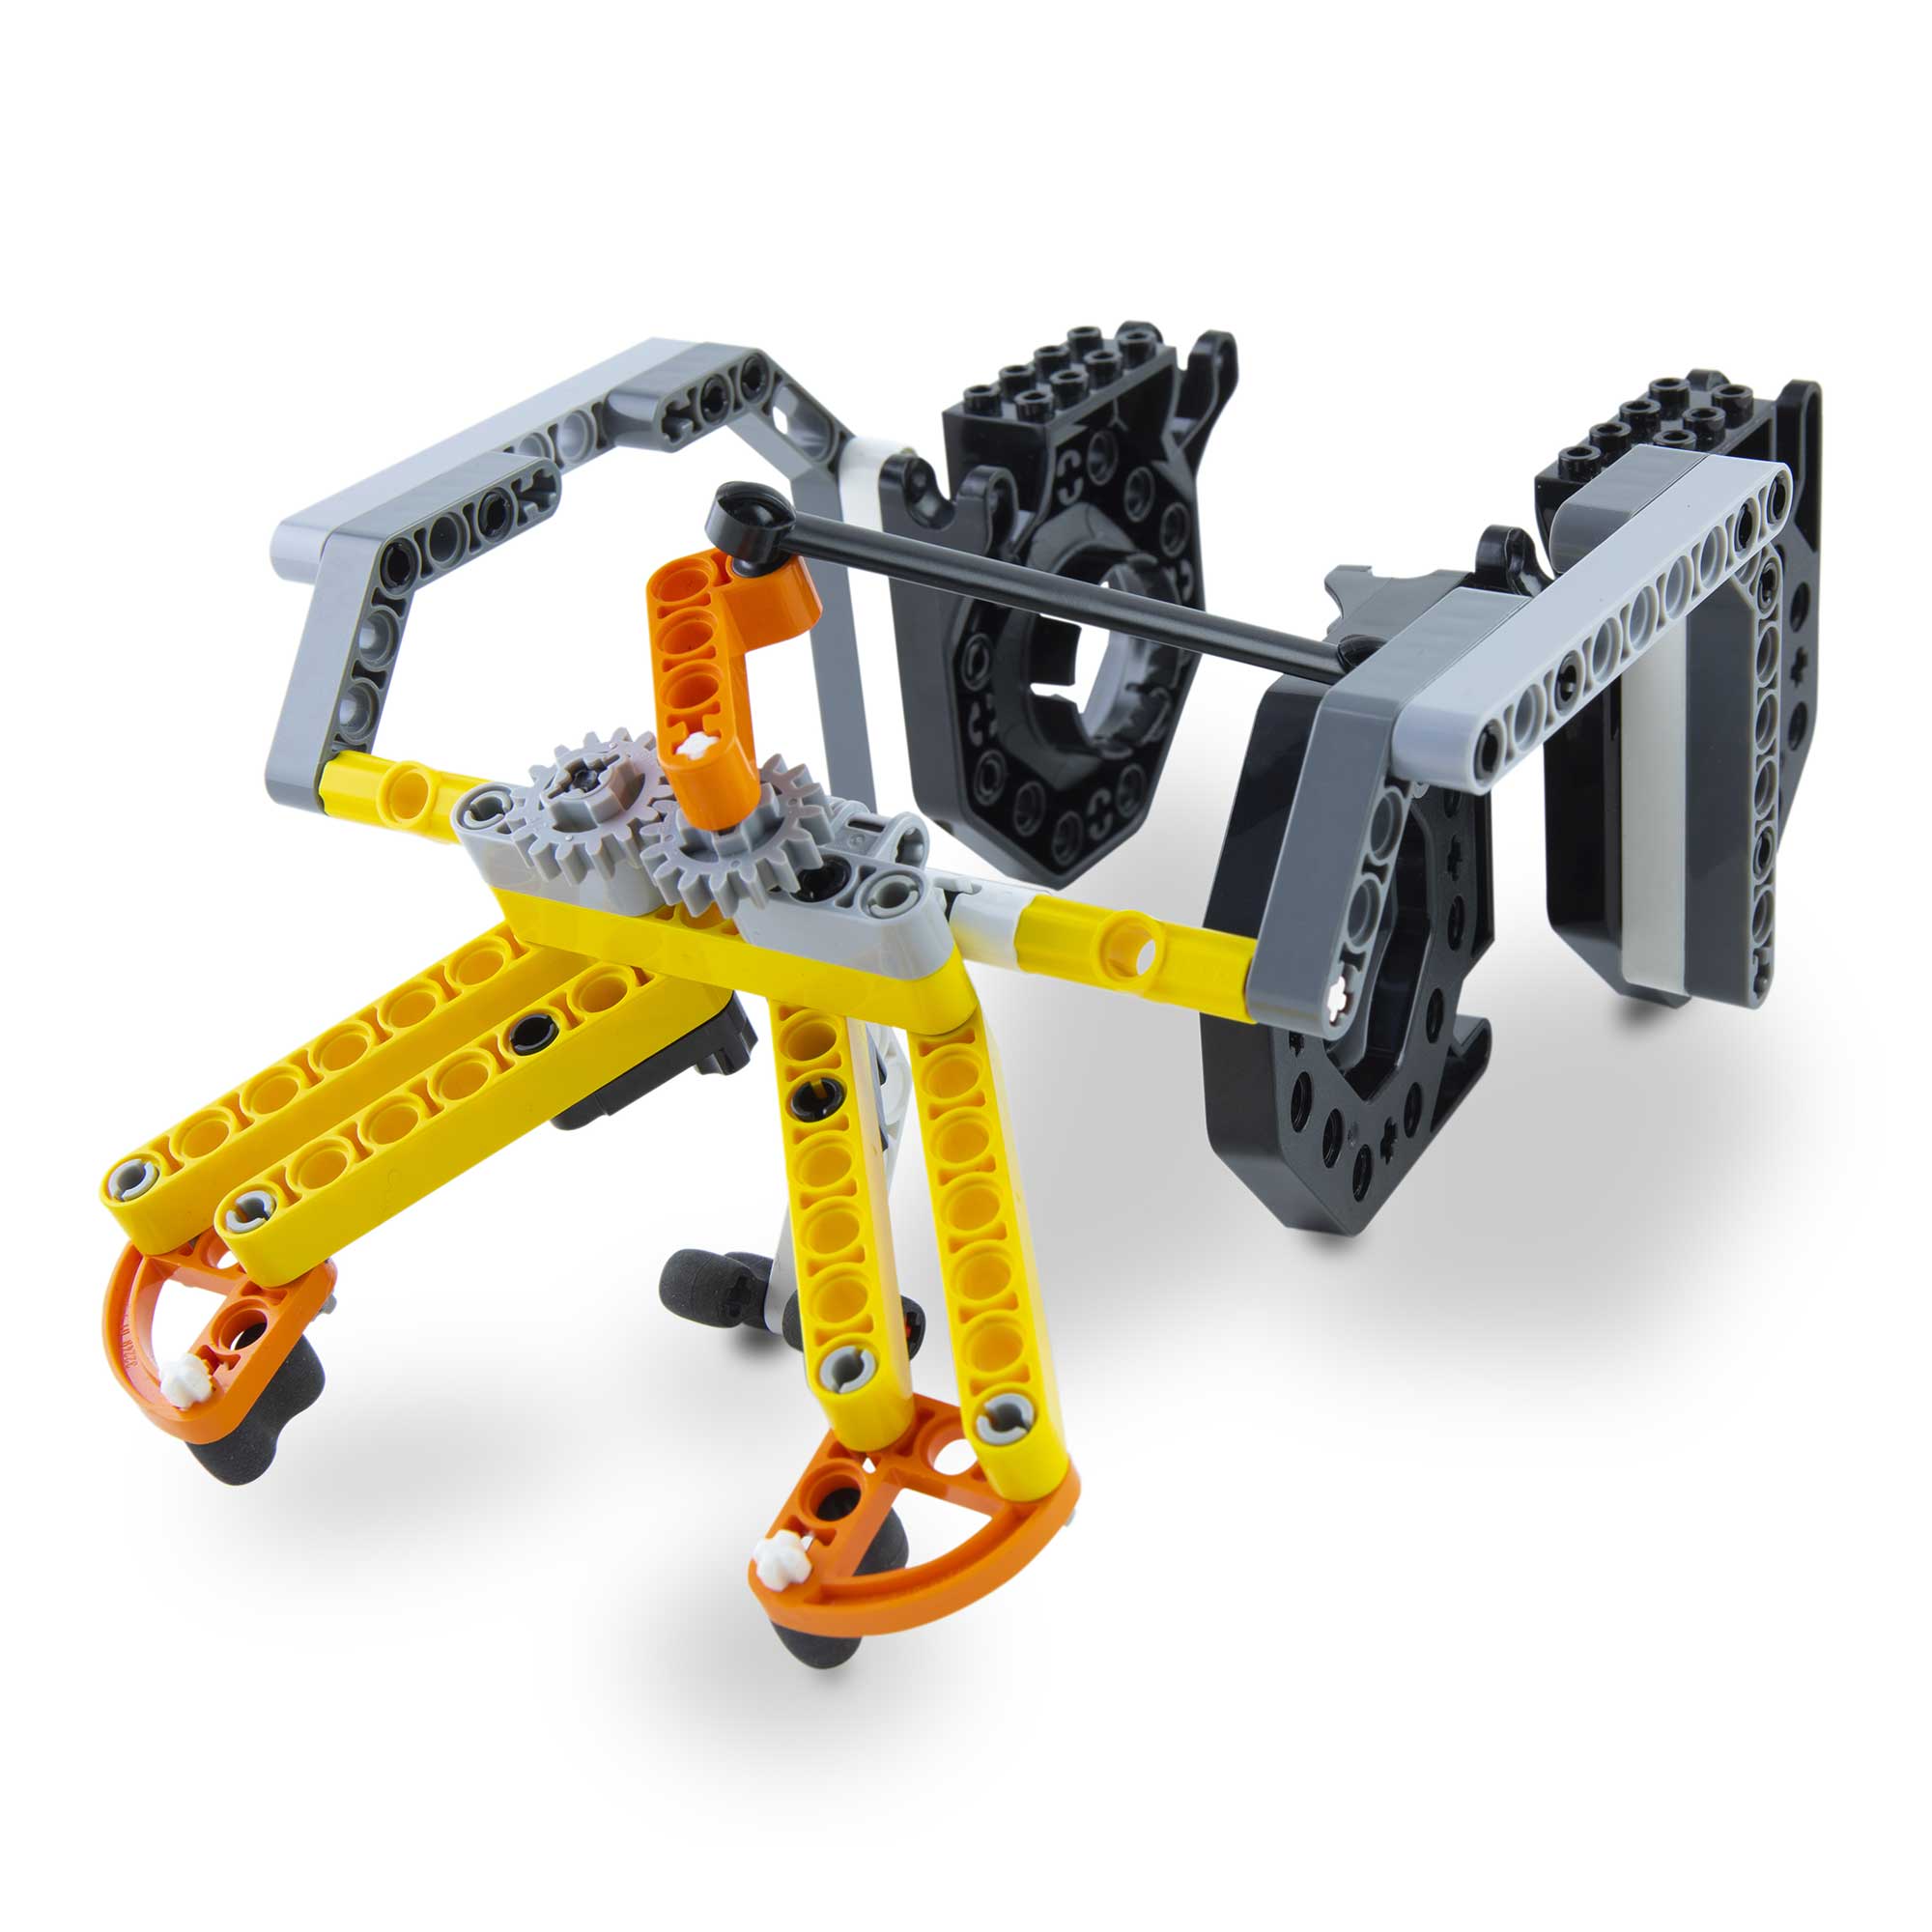
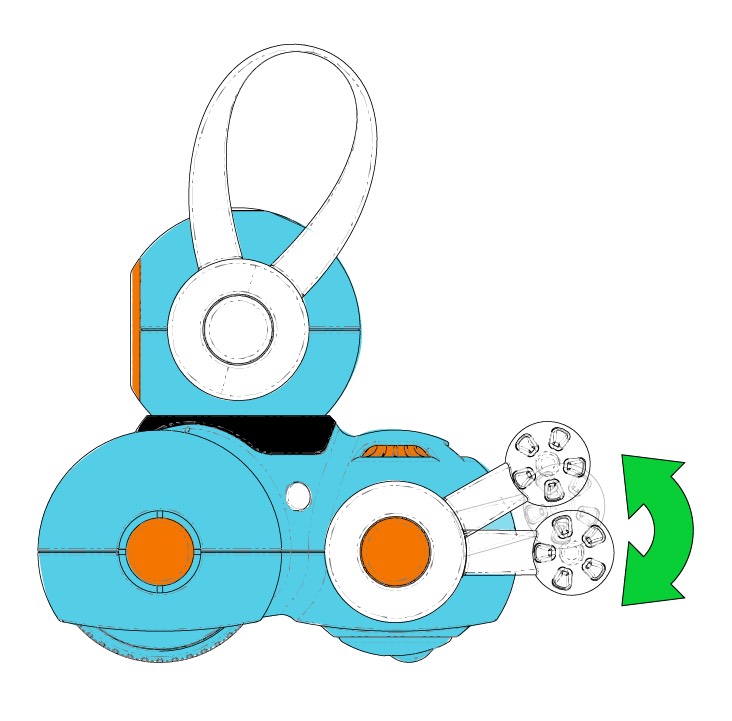
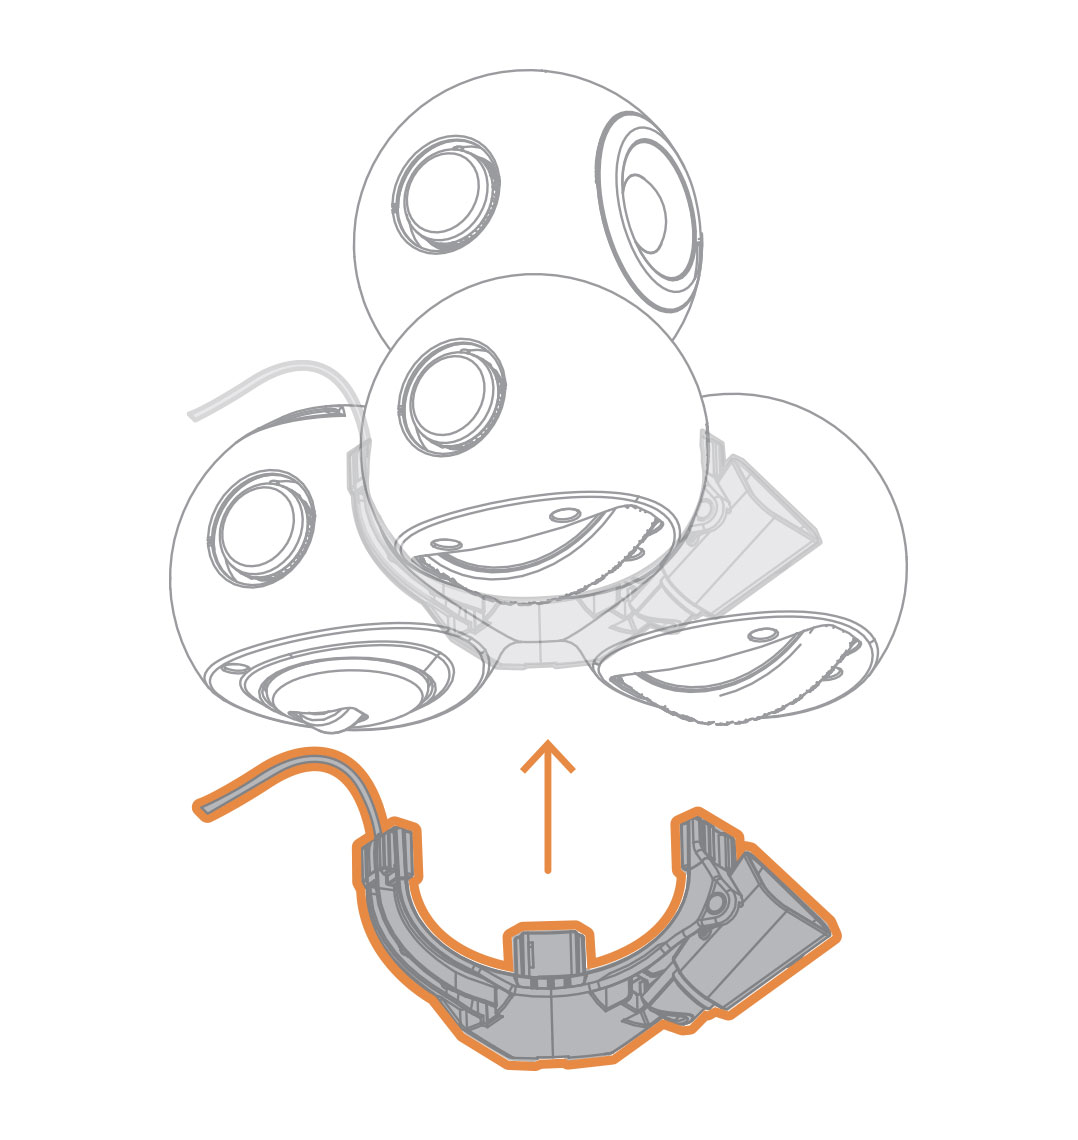
Bulldozer Bar
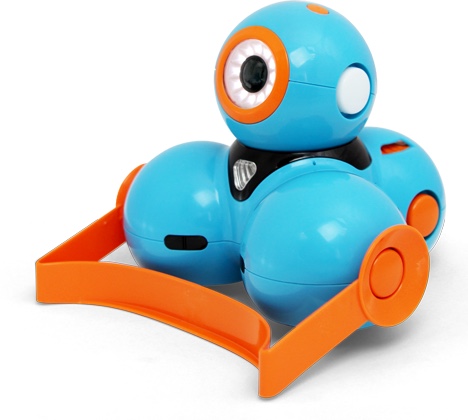
Messy room? No problem! Clean up your blocks and toys with Dash’s bulldozer bar.
Set up for:
Dash
Step 1
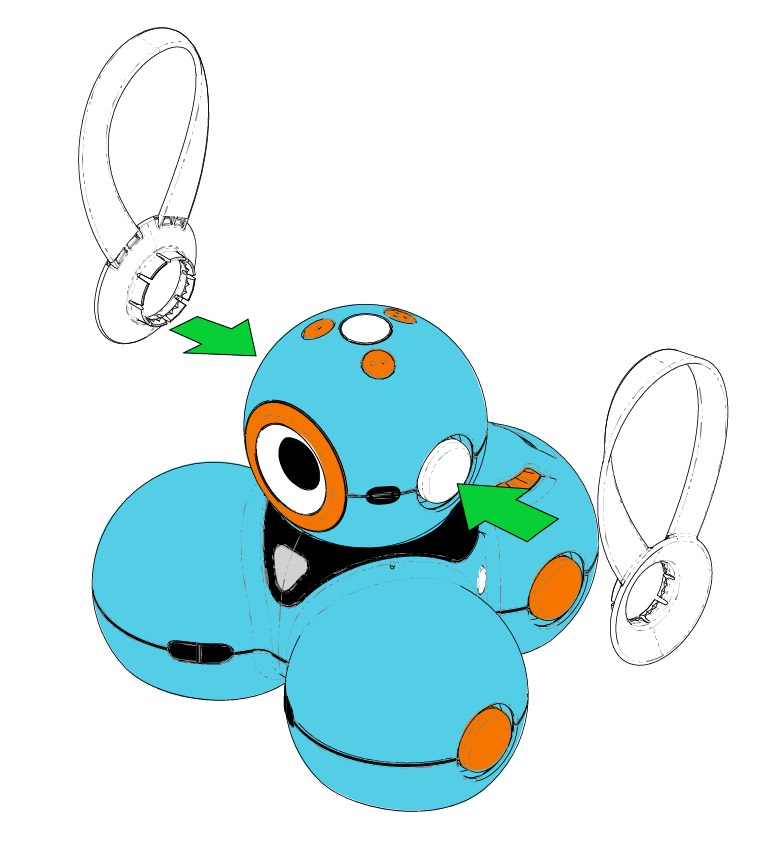
The bulldozer bar snaps on to the connectors on the sides of Dash’s front two wheels. Line up the rings of the bulldozer bar to the connection points on Dash.
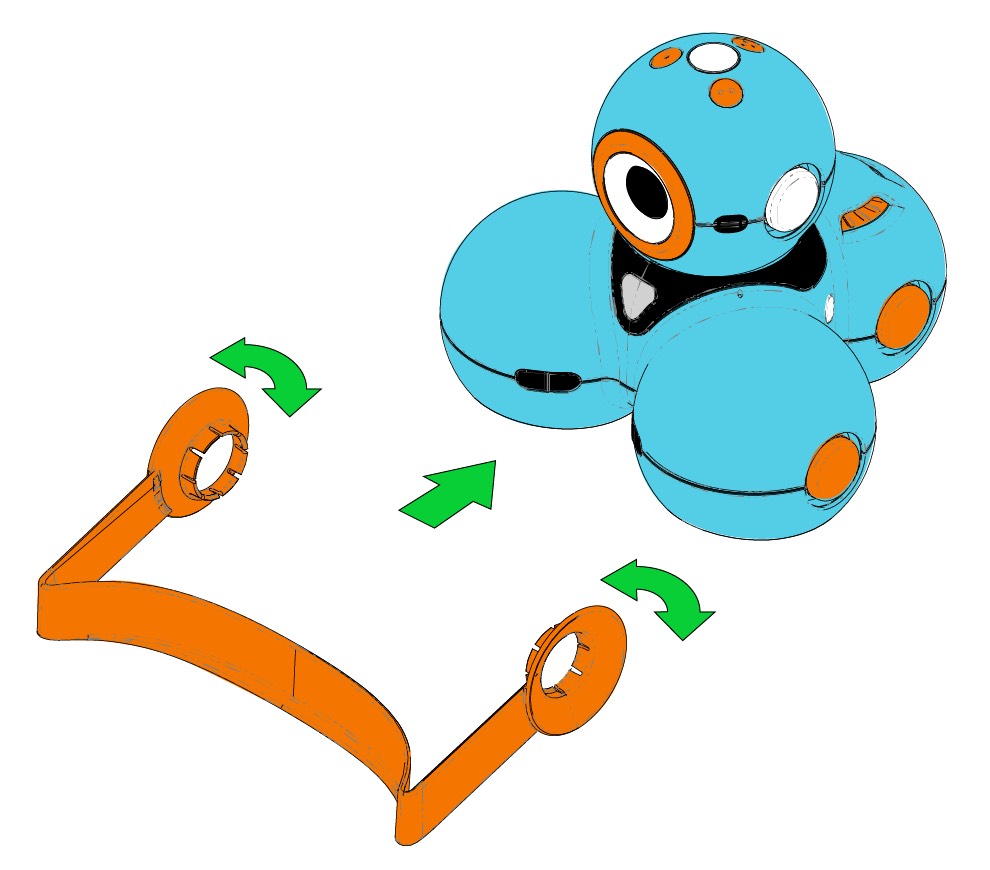
Step 2
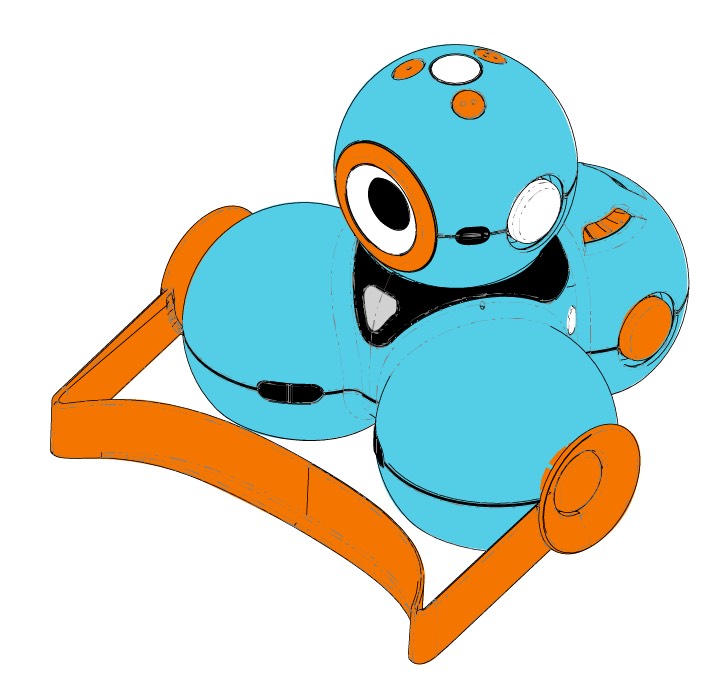
Press firmly until you hear a click to connect. The bulldozer bar should lie flat on the ground, and moves along with Dash as clean-up duty is completed!
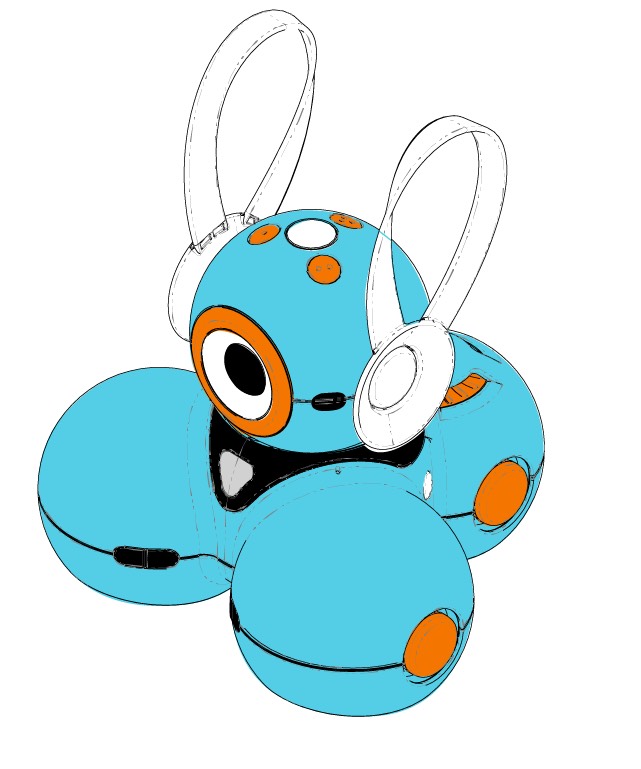
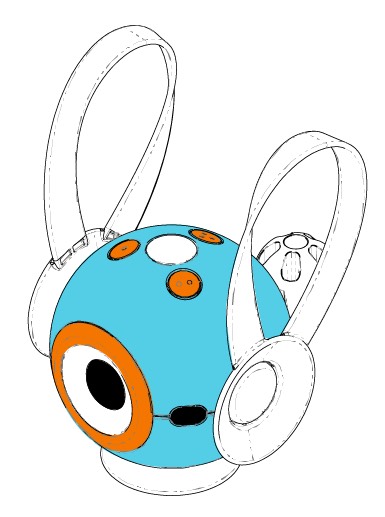
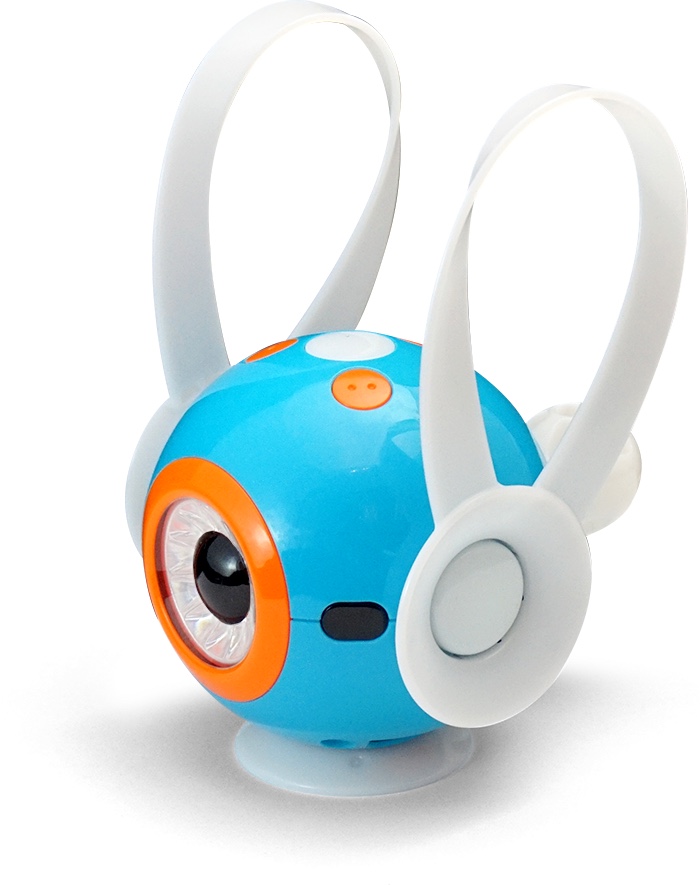
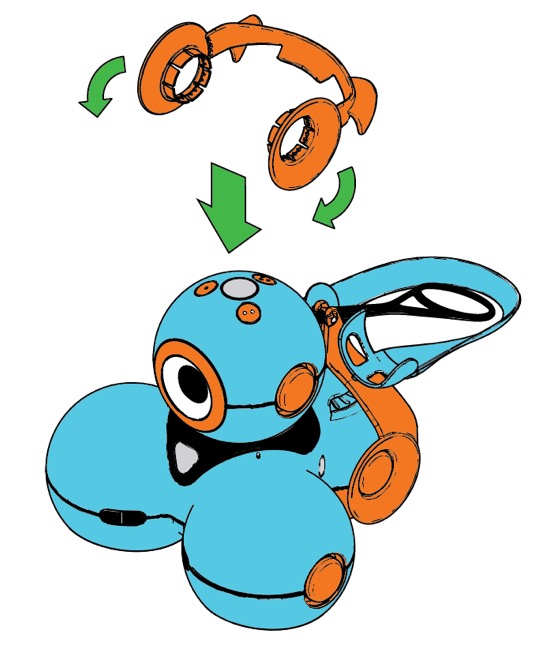
Bunny Ears & Tail
Intro: Dash & Dot love to dress up, pretend, and play! Your robots can hop around, and be as quick as a bunny with these fun accessories.
Set up for:
Dash
Dot
Step 1
Dash’s bunny ears can connect to the head or the body. To connect, line up the rings on the ears to the round connection points on your robot.
Step 2
Press firmly until the ear snaps into place.
Step 3
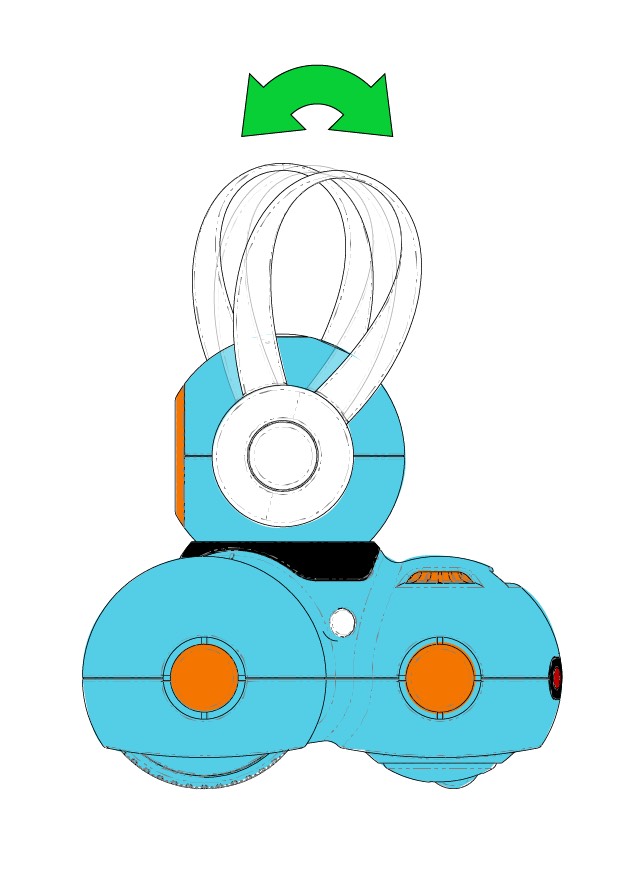
The bunny ears can be rotated up and down while connected. You will hear a click as they snap into place.
Step 4
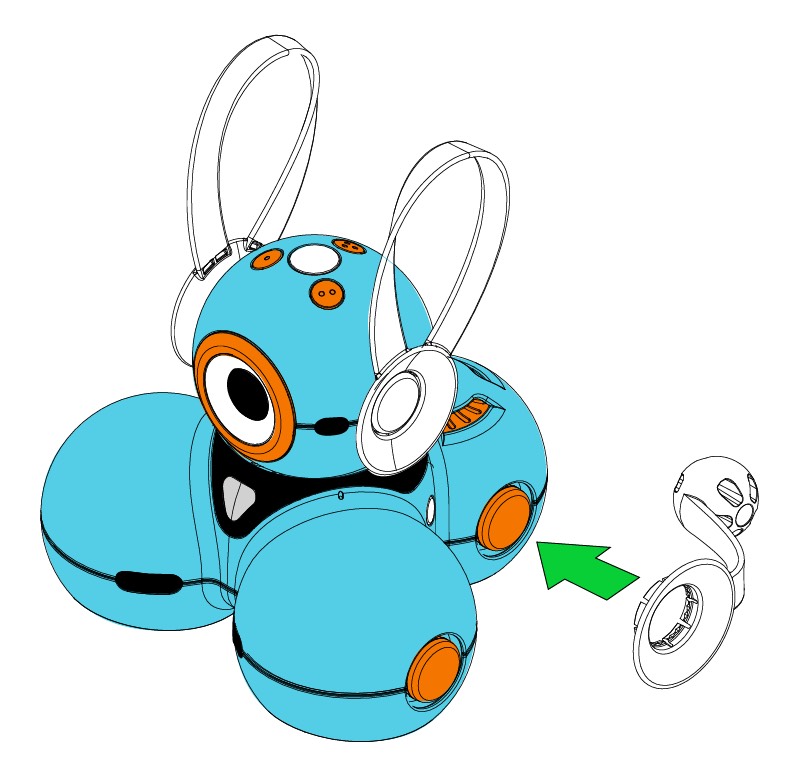
Line up the bunny tail’s connector ring with a round connection point on your robot. The two connectors on the back of Dash make a great place to connect the bunny tail.
Step 5
Press firmly until the tail snaps into place.
Step 6
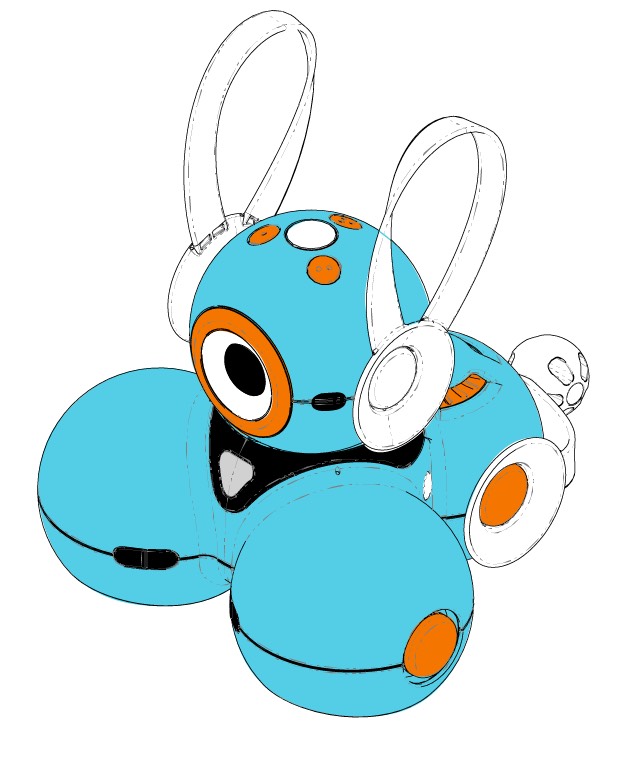
You can raise or lower the tail, which will click as it turns. If you are using an app that may require the rear sensor (like Blockly or Path), raise the tail about two or three clicks from the center level position to allow
Dash to sense objects using the rear distance sensor.
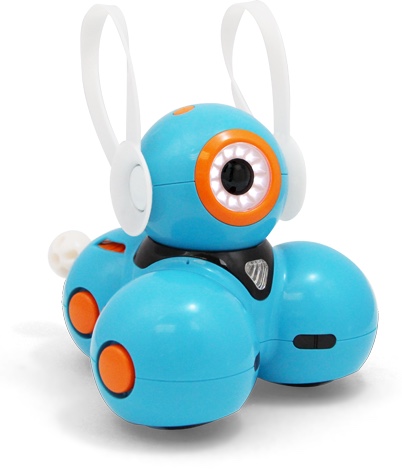
Bunny Ears & Tail
Intro: Dash & Dot love to dress up, pretend, and play! Your robots can hop around, and be as quick as a bunny with these fun accessories.
Set up for:
Dash
Dot
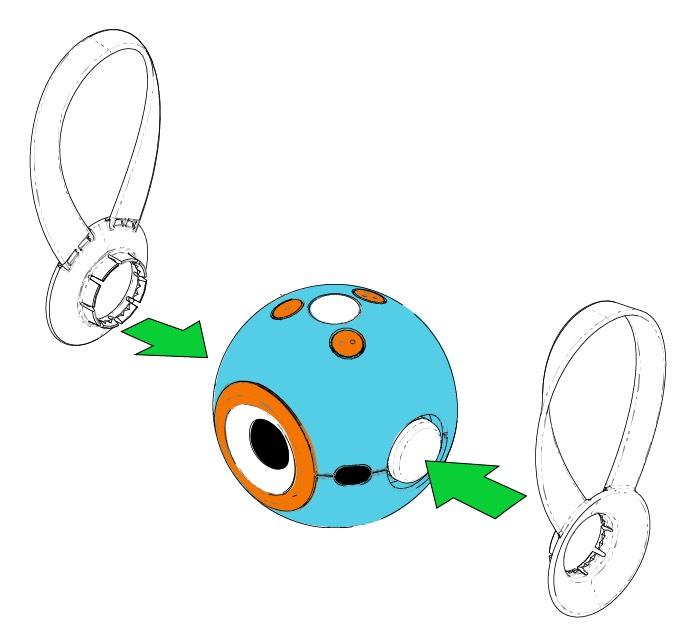
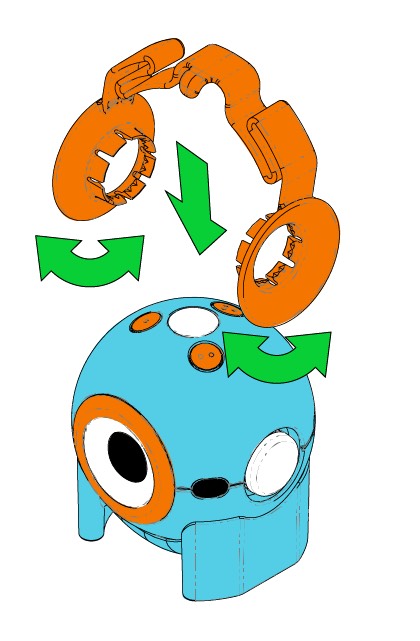
Step 1
Bunny ears can connect to either side of Dot’s head, or on the bottom. To connect, line up the rings on the ears to the round connection point on your robot. To use the bottom connector, remove Dot from the stand. Press firmly
until each ear snaps into place.
Step 2
Line up the bunny tail’s connector ring with a round connection point on your robot. The bottom connector is a great place to place the tail. To attach the tail to Dot’s bottom connector, remove the base.
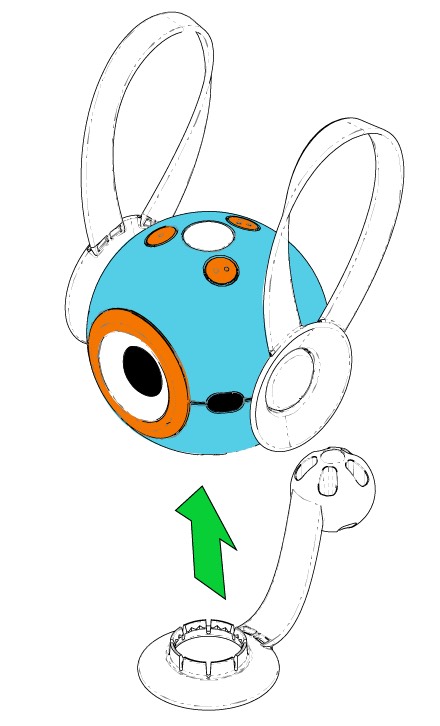
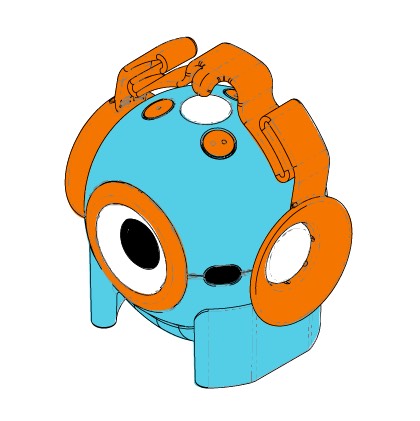
Step 3
Press firmly until the tail snaps into place.
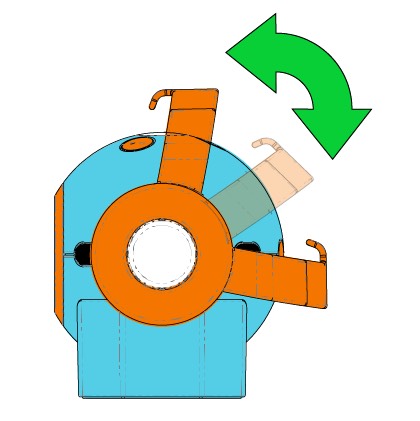
Step 4
The bunny ears can be rotated up and down while connected. You will hear a click as they snap into place.

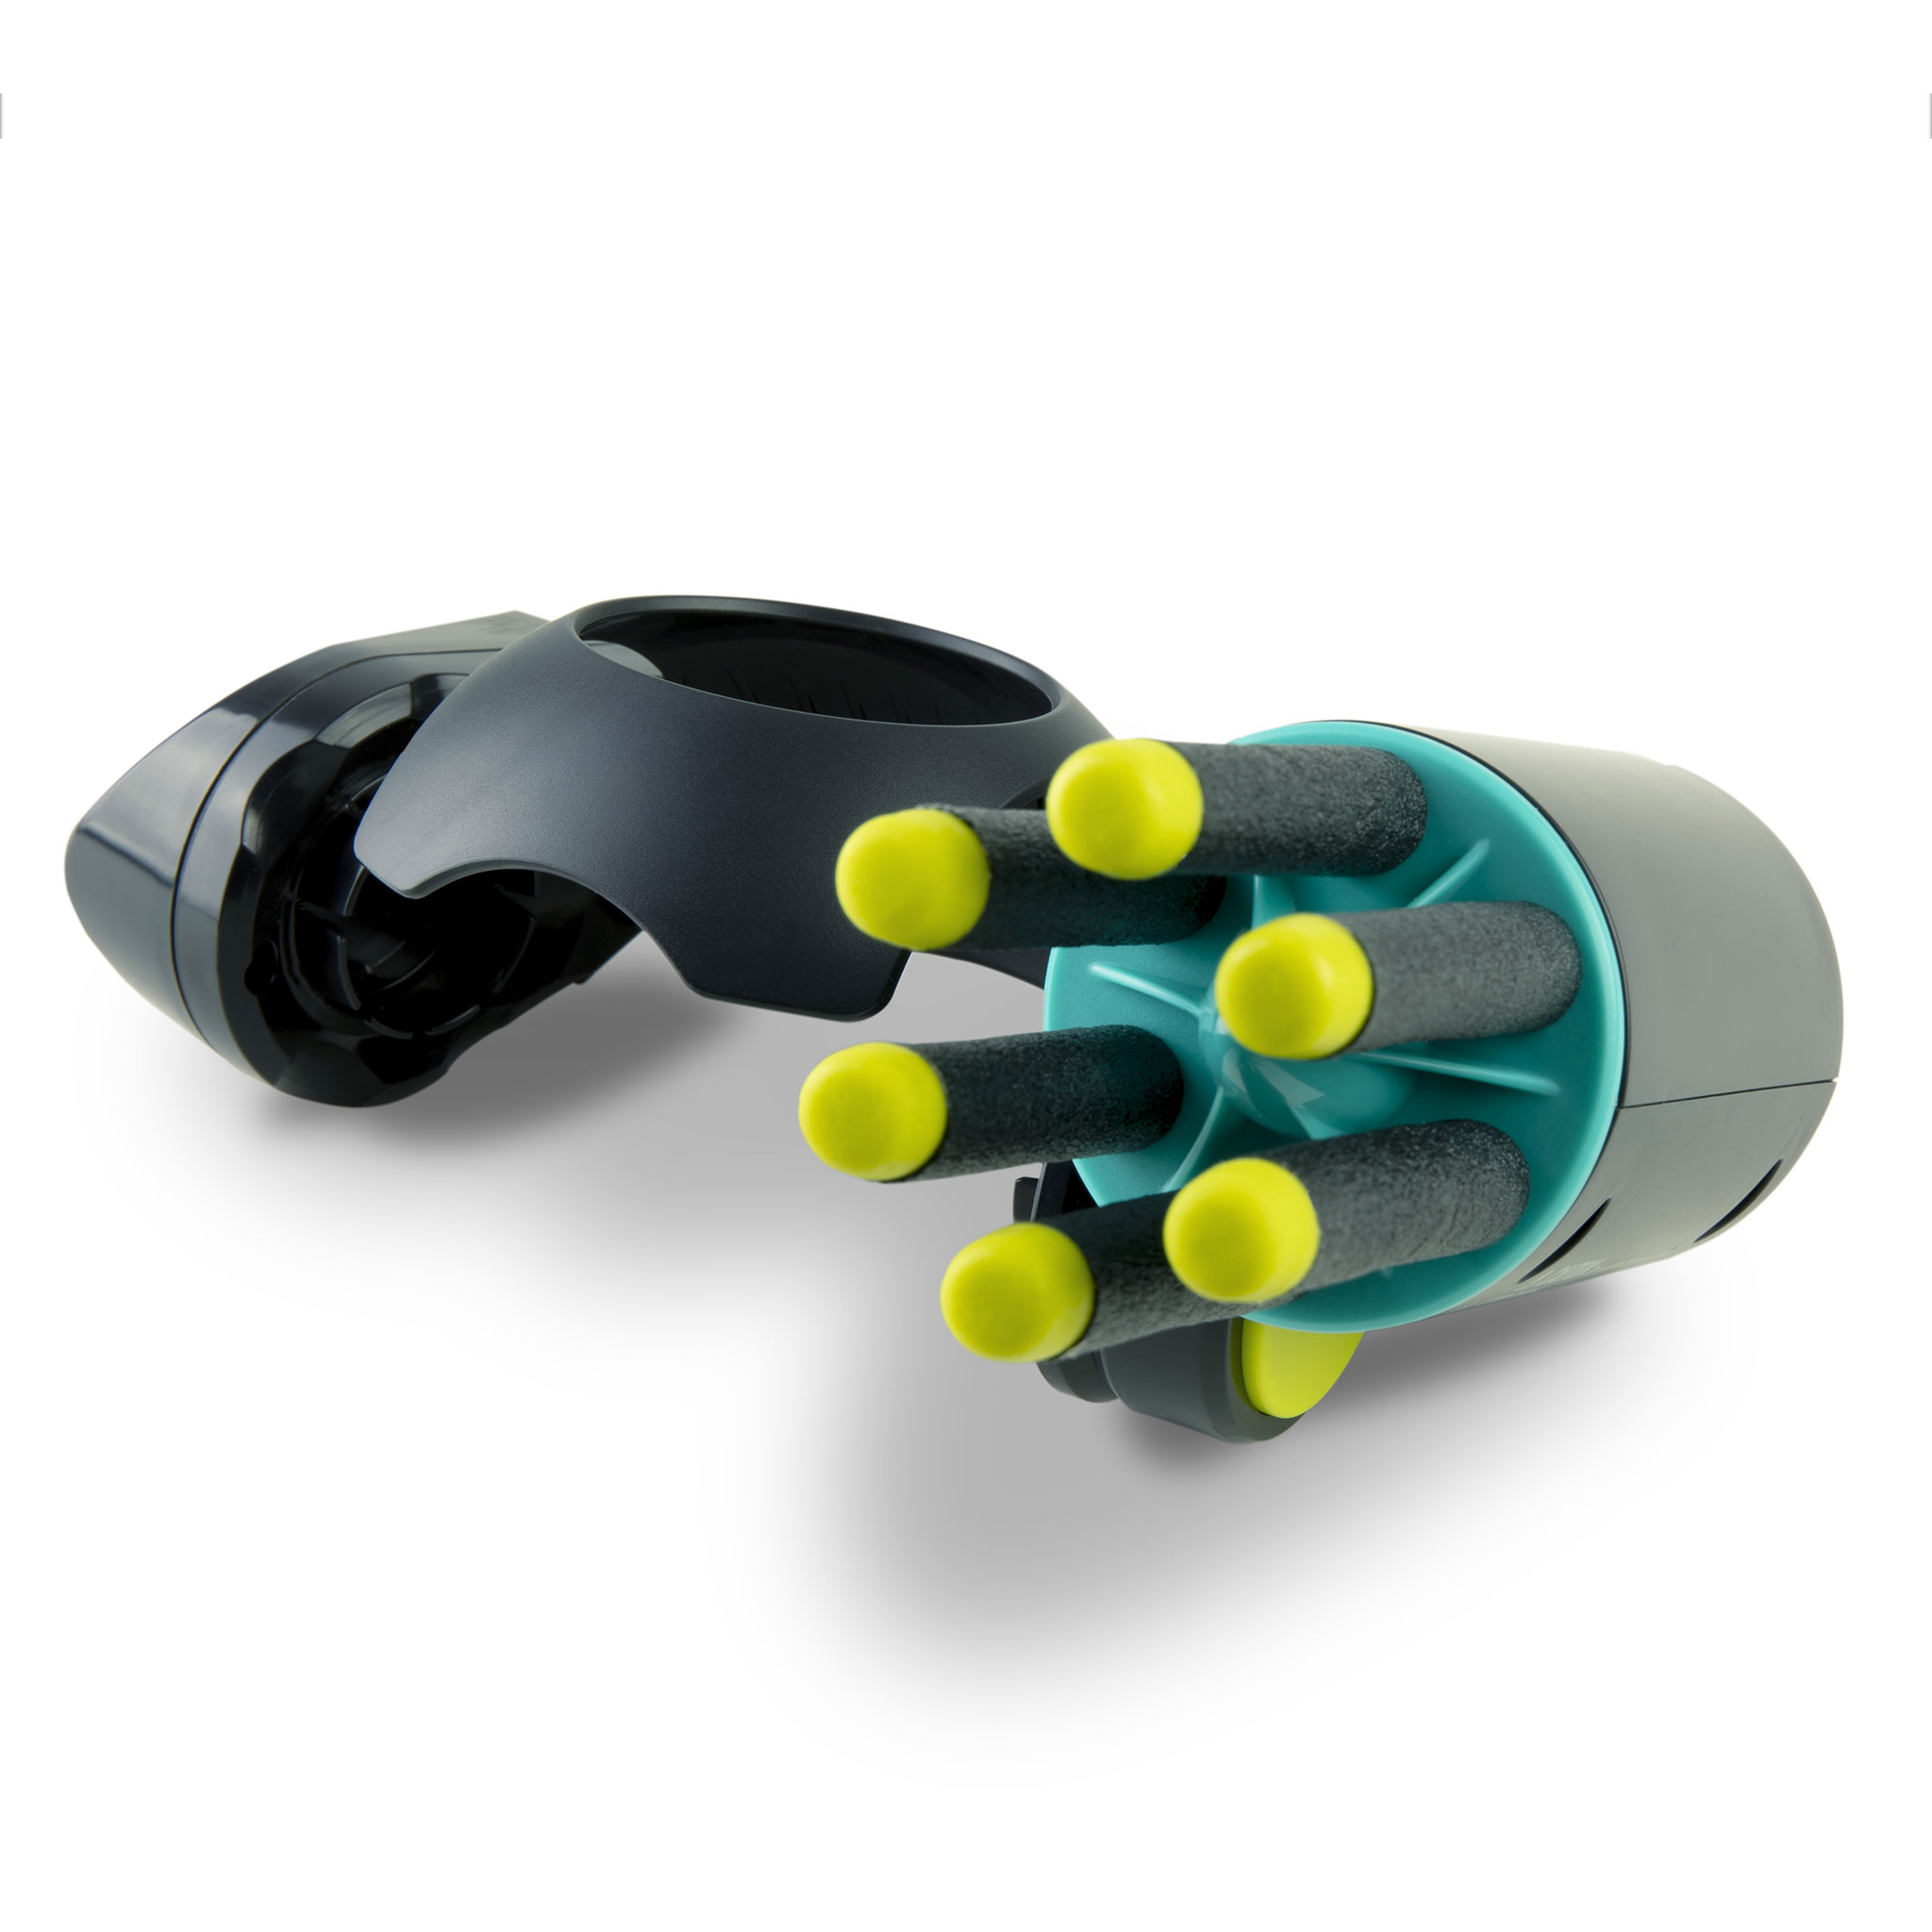
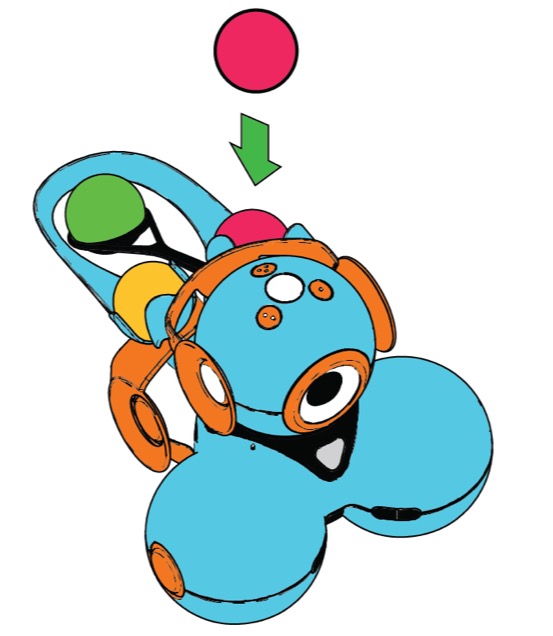
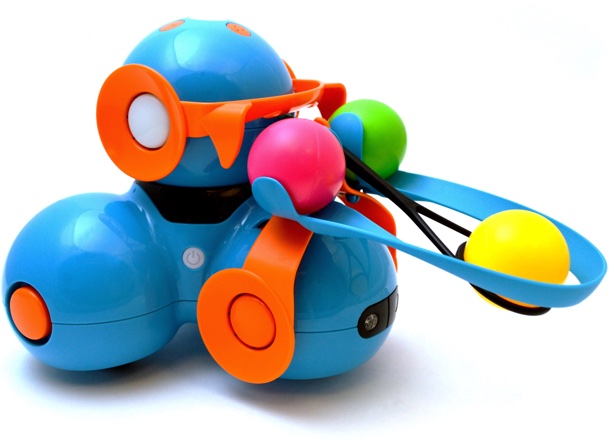
Launcher
Turn Dash into a projectile firing machine!
Set up for:
Dash
Step 1
The Launcher (blue) snaps on to the orange Connector. Line up the rings of the Launcher to the connection points on Connector, and snap into place.
Step 2
With the Launcher now affixed, press the Connector firmly on to the connection points on the sides of one of Dash’s wheels. Press firmly until you hear a click. Now slide the small black Ball Holder to the Launcher, with the
slender end affixed to the top of the Connector.
Step 3
TNow click the remaining orange Connector to Dash’s head, so that the curved piece is in the back. Line up the rings to the buttons on either side of the head and snap into place.
Step 4
Add one of the three colored balls to each of the ball compartments of the Launcher. The Launcher is now ready to use with the Blockly or Wonder apps. Use the apps to vary the power on the Launcher and try to aim for targets.
Ready… Aim… Launch!
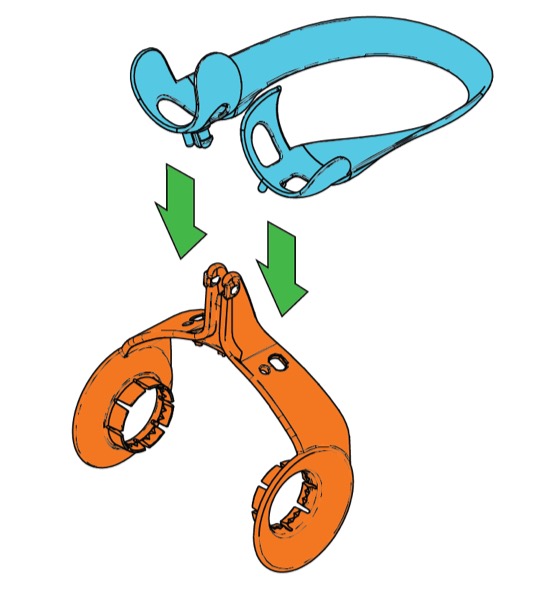
Sketch Kit
From code to canvas, use the Sketch Kit to design drawings that come to life right before your eyes. Program Dash or Cue to draw shapes, make abstract art, and even write a message for a friend.
Set up for:
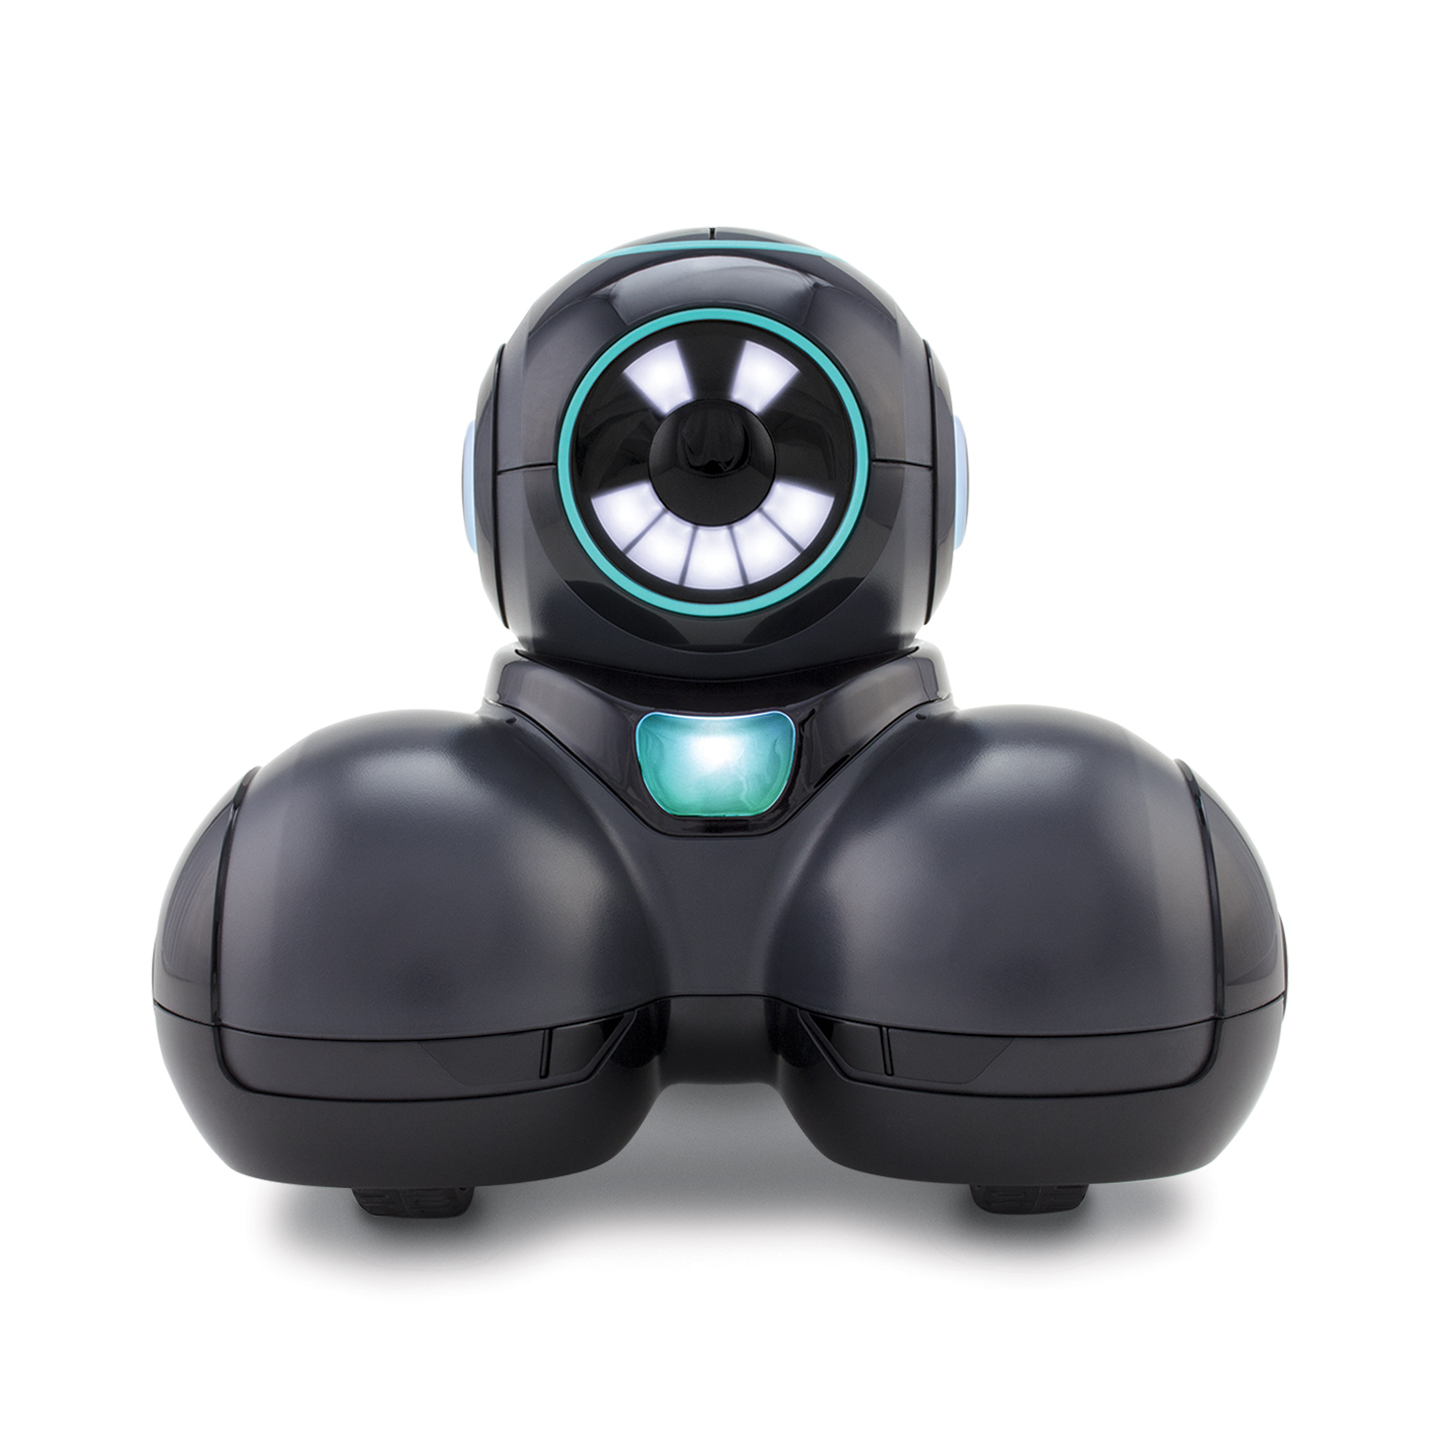
Dash and Cue
Step 1
Attach the harness under the robot, making sure it’s snug and secure.
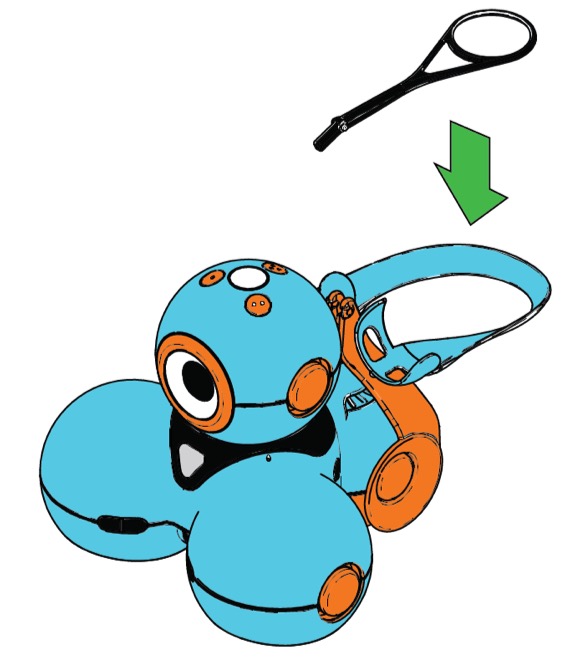
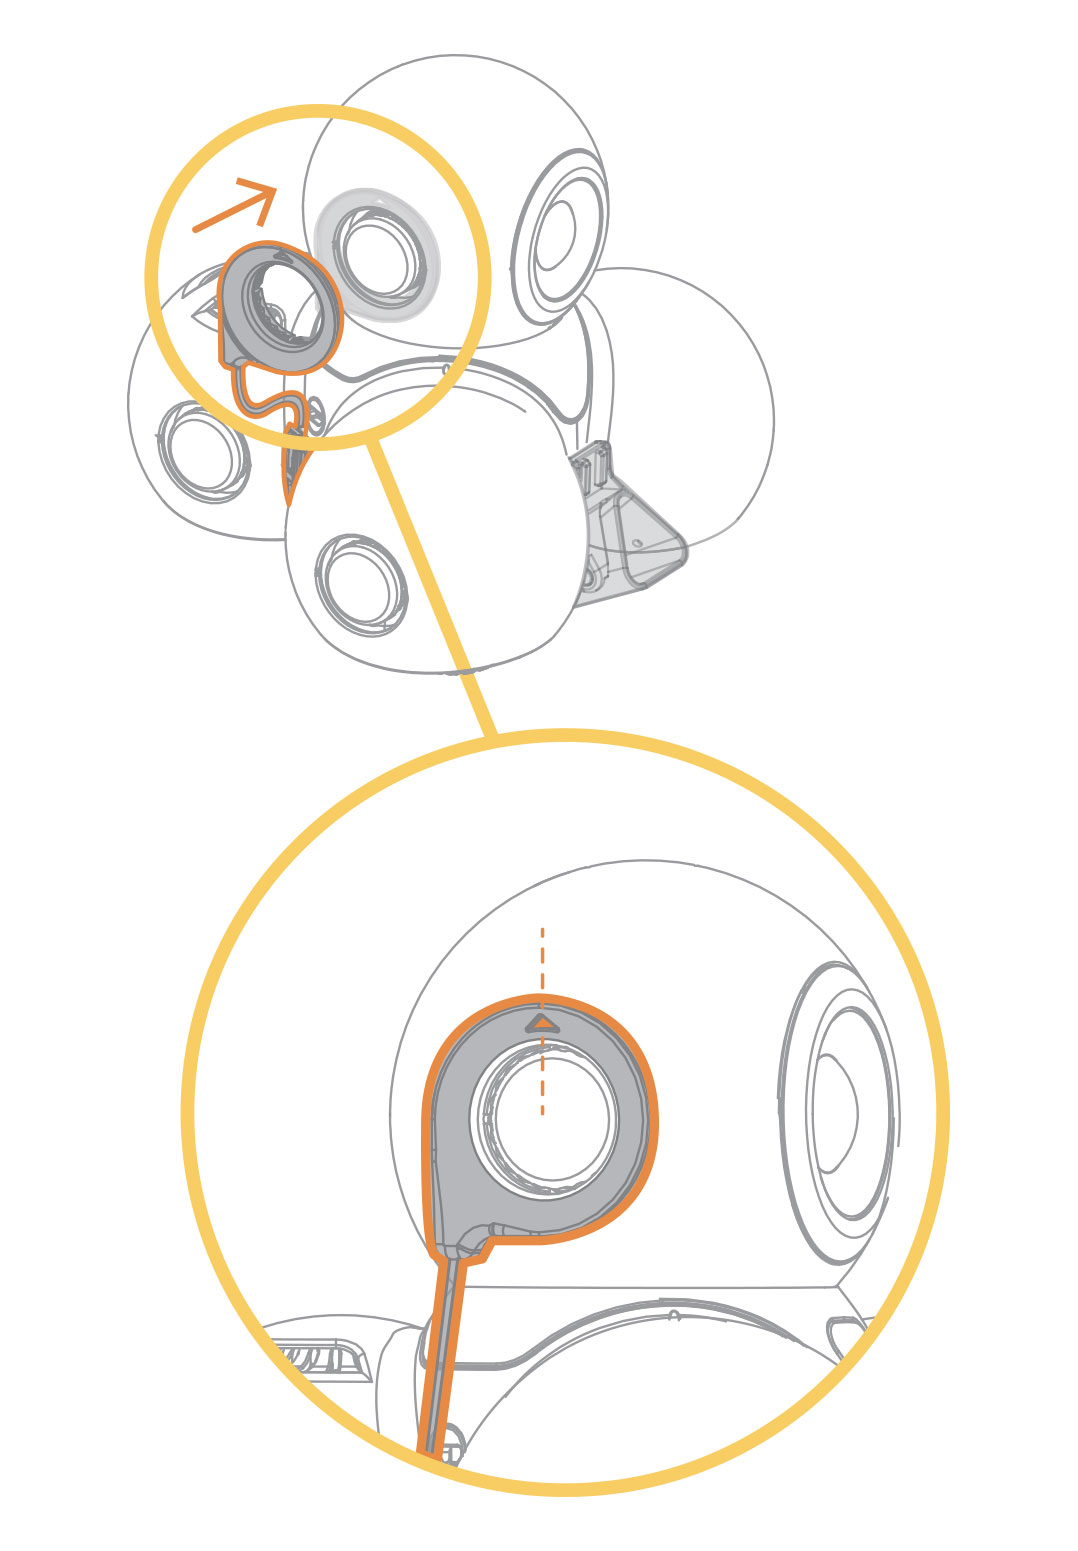
Step 2
Attach the earpiece onto the robot’s right ear. Make sure the small triangle arrow is pointing directly up and the robot’s head is not tilted up or down. Press firmly until it snaps into the robot’s ear.
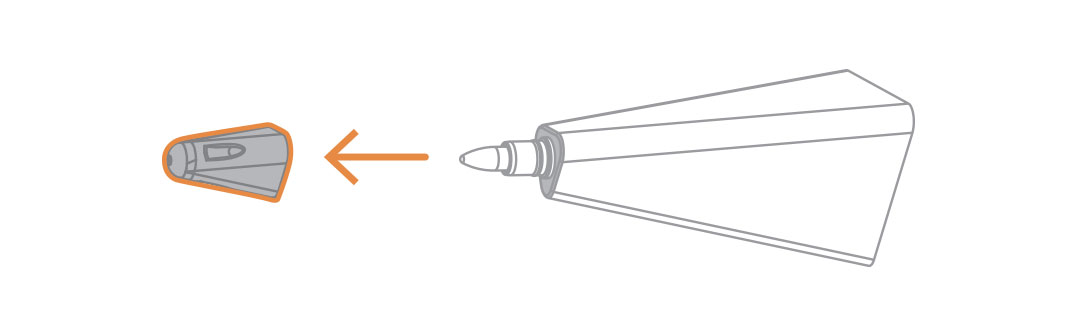
Step 3
Open the marker cap. Make sure you store the cap somewhere for safekeeping. If you don’t put the cap back onto the marker when you’re finished, the ink can dry out in up to two hours.
Step 4
Insert the marker into the marker harness. When the marker is secure, you will hear a “click” sound. If the attachment has moved away from the robot’s body, make sure to press it towards the robot’s underside.

Software
The Sketch Kit is compatible with the Blockly, Wonder, and two Cue apps on all available platforms. You can find the Sketch Kit commands in the Accessories menu. For best results, first set Dash or Cue to quiet mode so that
the robot does not move around once you attach the Sketch Kit. For instructions visit: https://help.makewonder.com/customer/portal/articles/2931692-how-do-i-set-my-robot-to-quiet-mode-
Accessing Sketch Kit Commands
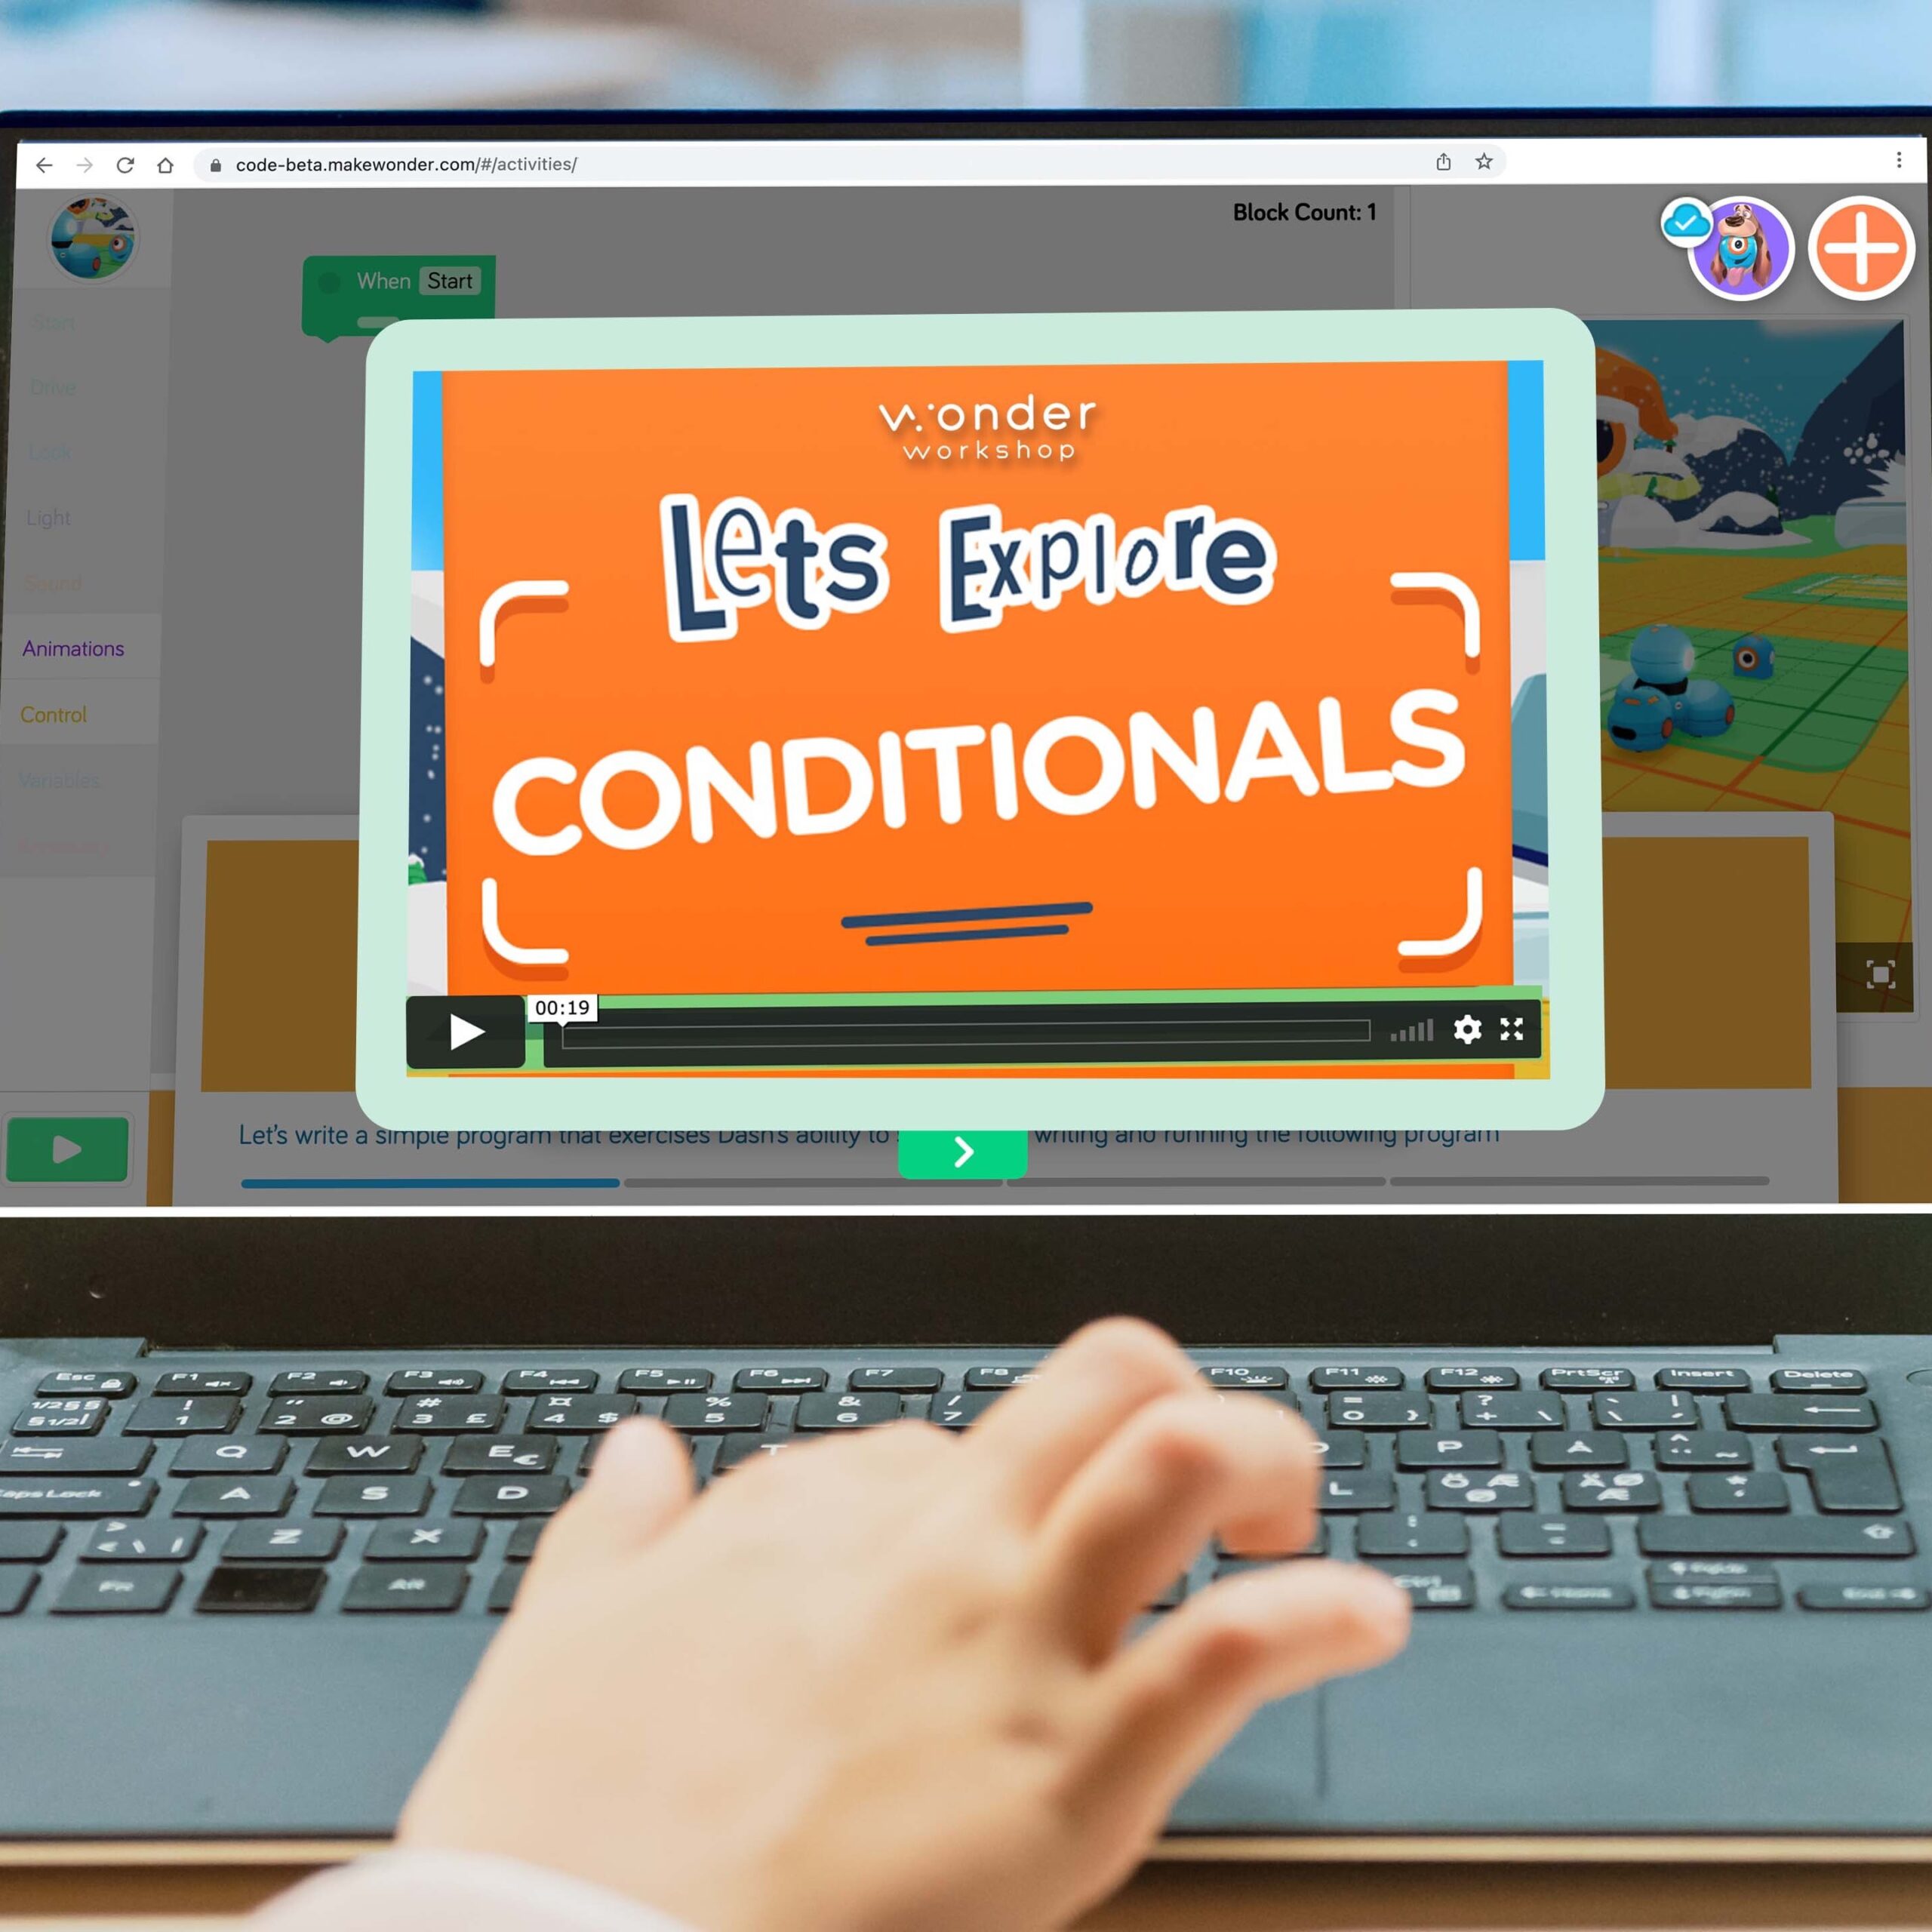
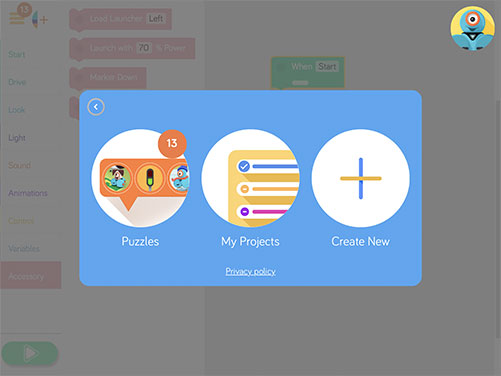
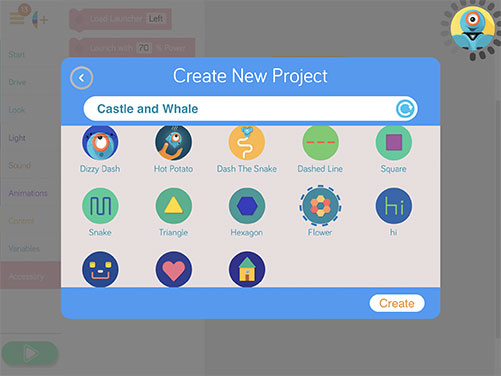
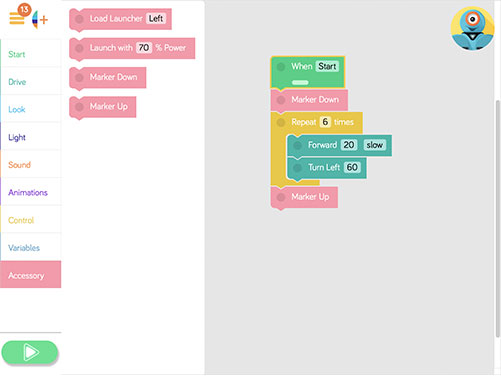
Blockly
Start out by trying one of our example programs. Go to the “Create New” section of the Blockly menu and scroll down to select one of the example programs. The solution icons will match the drawing
on each challenge card that comes with the Sketch Kit.
Next, try making your own
creation. Use the marker down and marker up commands in the Accessory section to start and stop drawing, respectively.
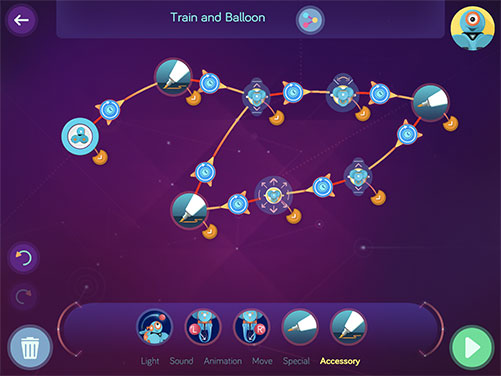
Wonder
Start out by drawing the programs from the starter cards. Enter the program key to view and edit these premade programs. For instructions on how to use a Wonder Key, visit: https://play.makewonder.com/community/using-a-key/
Next, try making your own creation. Use the marker down and marker up commands in the Accessory section to start and stop drawing, respectively.
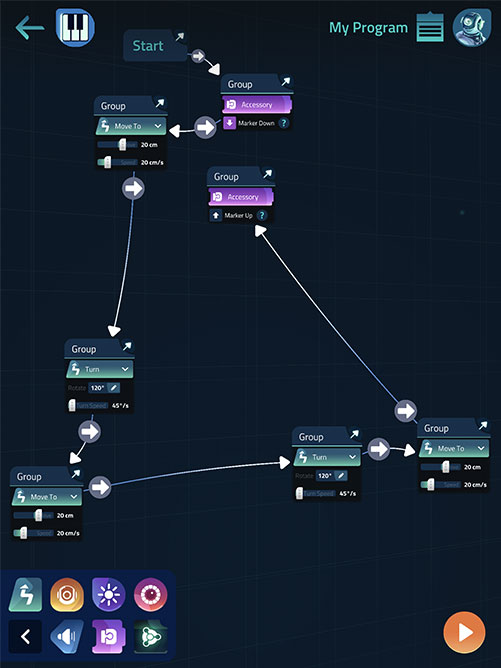
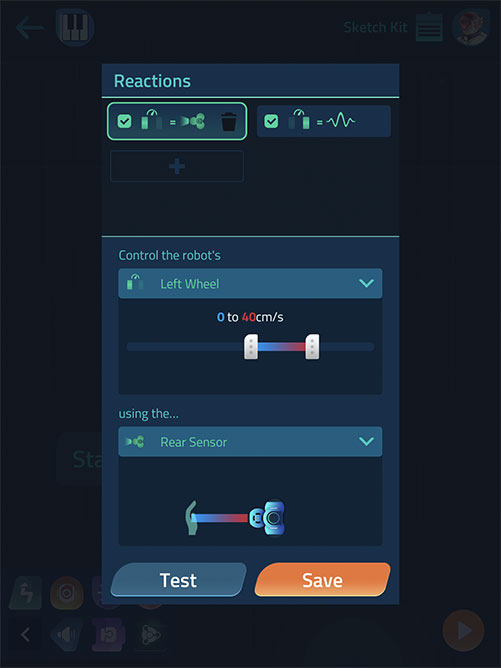
Cue
Add marker up and marker down commands to Cue programs made with Create or Code.
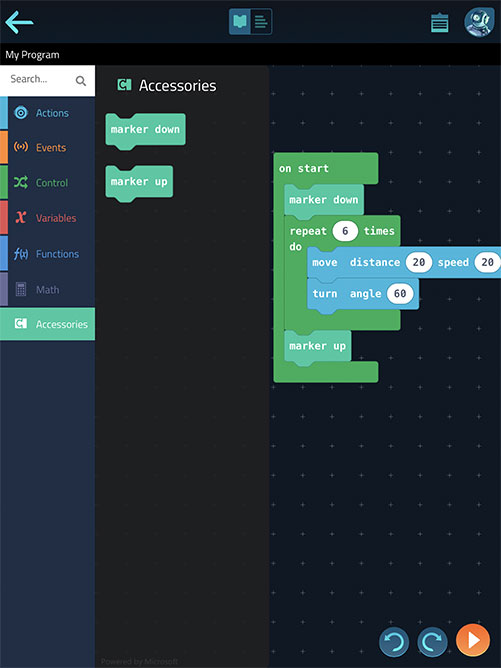
Add Reactions to your Create program to build your own control system for drawing. Did you know that Cue change wheel speeds based
on how close your hand is to the back sensor? Combine this Reactions setup with a marker down state to turn your interactions with Cue into art. Make your very own Jackson Pollack!

Best Practices and Tips
Taking Care of your Sketch Kit
- Remember to save the marker cap and put it back on the marker after using it. If the marker is left uncapped, the ink can dry out in about two hours.
- After you’re done drawing, wipe the whiteboard mat and the robot’s wheels clean before the ink dries with a soft, damp cloth
- We recommend that you use dry erasers, cloth, or soft tissue paper to clean the surface of the mat. Wet wipes can be used, but make sure the mat is dry before the robot begins drawing, to avoid ink smudges.
Drawing Tips
- The accuracy of your drawings can depend on several environmental factors. To obtain consistent results make sure to do the following:
- Use masking tape or your marker to make sure your robot starts at the same spot every time you run your program.
- Use low robot speeds when drawing. In Blockly, the best results are at the “Very Slow” speed. In Cue, the best results are at about 15 cm/s.
- Place the Wonder Whiteboard Mat on the floor. Check the mat for bumps or debris on or below the mat’s surface before starting to draw.
- Check and make sure that the harness of the Sketch Kit is attached tightly to your robot. Use the arrows and guidelines on the ear piece to check that it is properly aligned with your robot’s ear. It also may
be worth removing the Sketch Kit and re-attaching it to the robot. - Make sure you’re using the Wonder Workshop Dry Erase Markers that came with the Sketch Kit or Refill Pack. We cannot ensure that the Sketch Kit will draw properly using other types of markers.
- Have only one or two robots drawing on the Wonder Whiteboard Mat at a time.
- Don’t forget to document your artwork by taking photos and videos before.
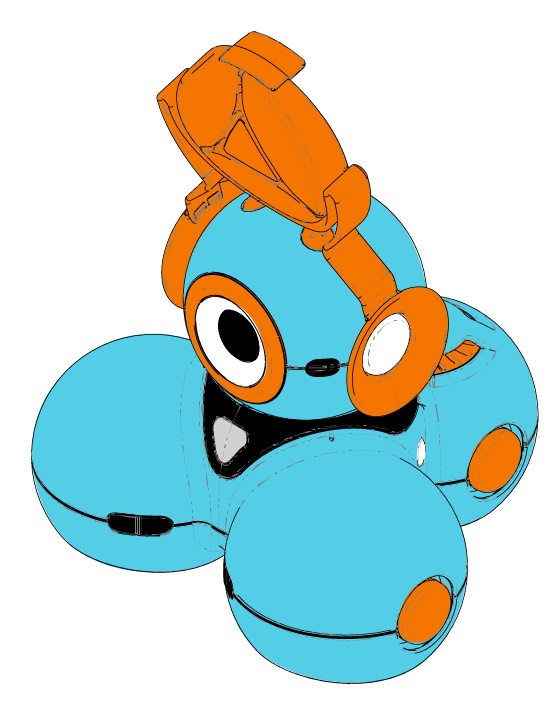
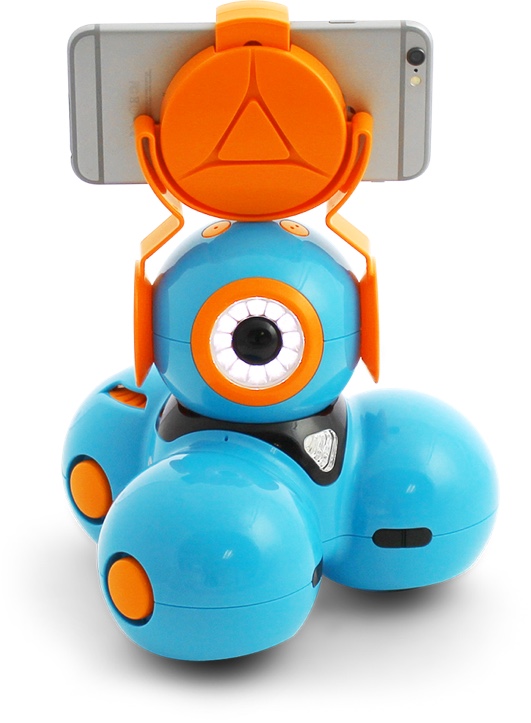
Smartphone Mount
Take photos and videos from a robot’s point of view!
Set up for:
Dash
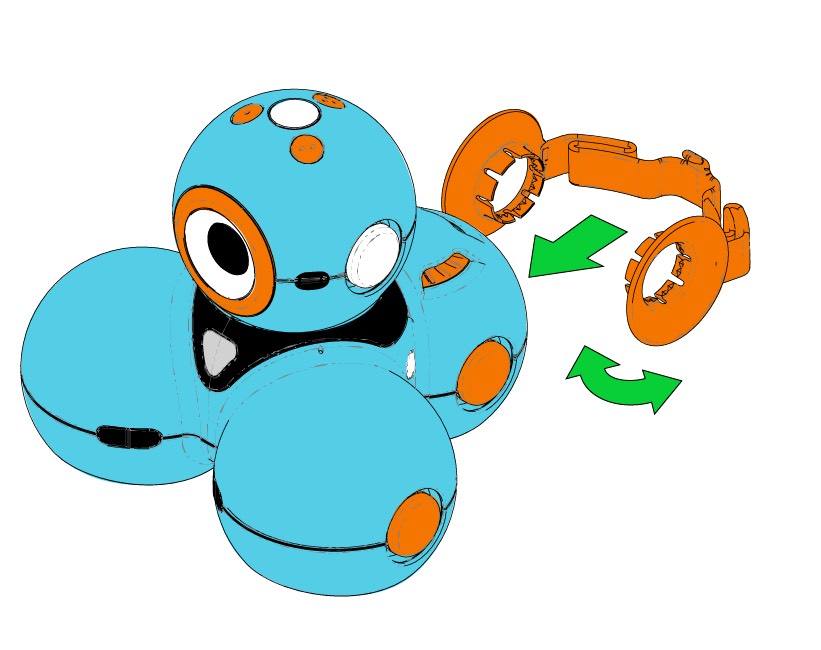
Step 1
Pull the connector rings of the smartphone mount outward and line them up around Dash’s head.

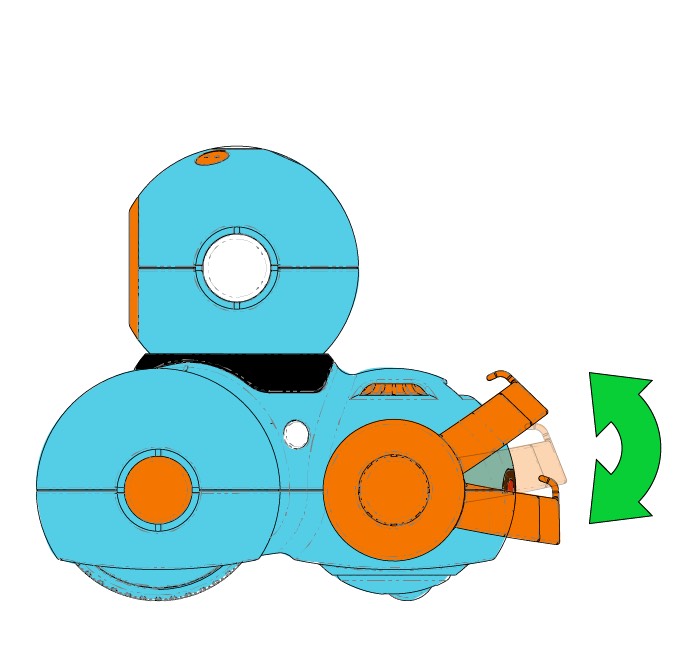
Step 2
Snap the rings into place to connect smartphone mount to Dash’s head. The mount can rotate and lock at 90 and 45 degrees (straight up and down, forward, backward, or diagonal), but we recommend keeping it upright to keep your
smartphone balanced on top of Dash.
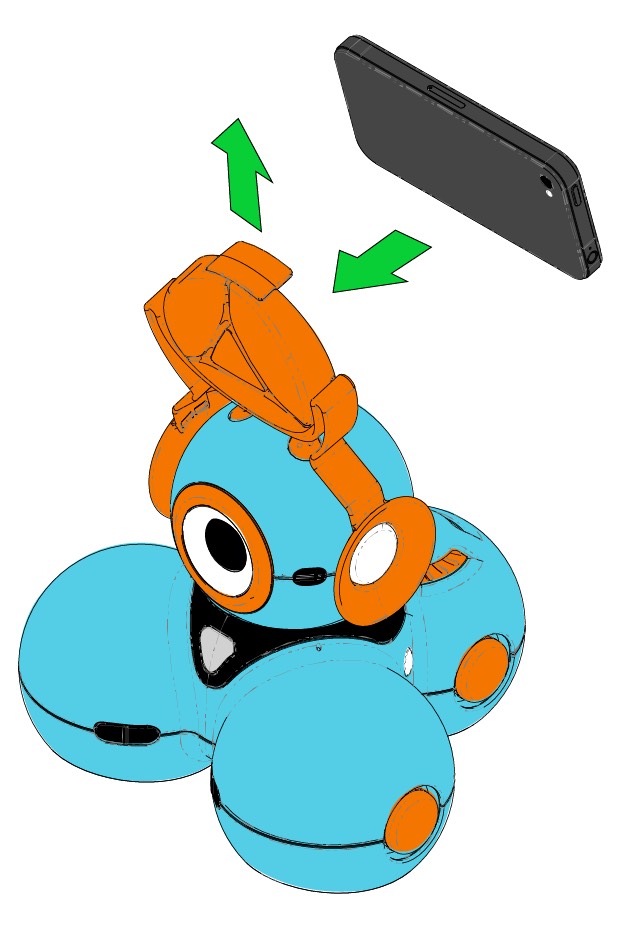
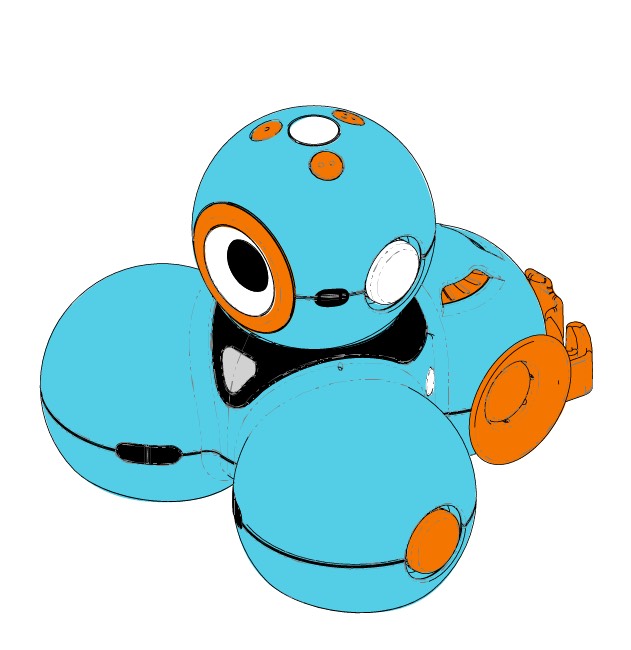
Step 3
Grab your smartphone, and adjust the mount so your phone fits snugly. The screen of your smartphone should be facing the back of the robot. Take a test photo to check your smartphone camera’s position!
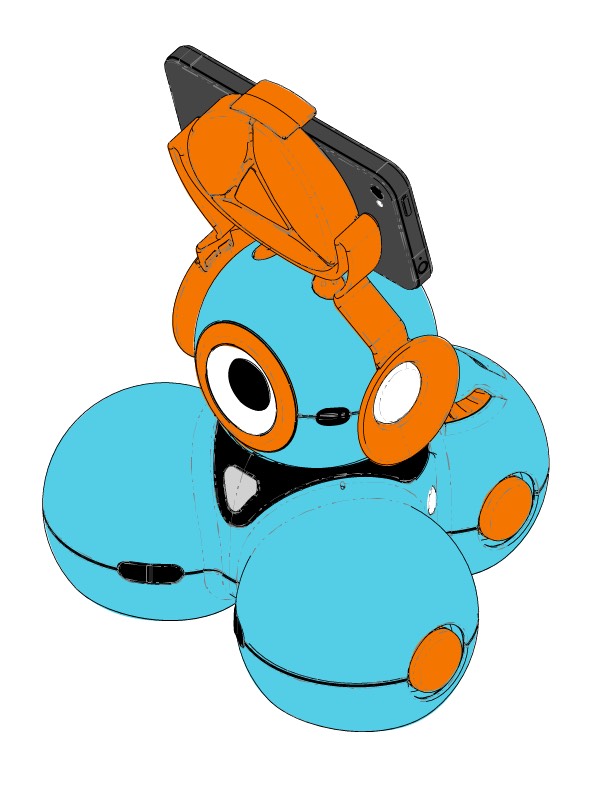
Step 4
Once your smartphone is firmly secured and positioned correctly within the mount, and then Dash is ready to roam!
Tow Hook
Whether delivering a special message with Dash, or hanging around with Dot, the tow hook introduces many new possibilities for robot adventures!
Set up for:
Dash
Dot
Step 1
Pull out the connector rings outward and line the tow hook up to the connection points on Dash’s back (or head, if you prefer). The tip of the hook should be pointing upward (or forward, if used on Dash’s head).
Step 2
Press firmly to snap the tow hook into place.
Step 3
Connectors lock at 90 and 45 degrees (straight up and down, forward, back, or diagonal). You can change the tow hook’s position by disconnecting and snapping back in at another angle. Once it is attached, Dash is ready to tow!
Tow Hook
Whether delivering a special message with Dash, or hanging around with Dot, the tow hook introduces many new possibilities for robot adventures!
Set up for:
Dash
Dot
Step 1
Pull out the connector rings outward and line the tow hook up to the connection points around Dot.
Step 2
Press firmly to snap the tow hook into place.
Step 3
Connectors lock at 90 and 45 degrees (straight up and down, forward, back, or diagonal). You can change the tow hook’s position by disconnecting and snapping back in at another angle. Once it is attached, Dot is ready to hang!
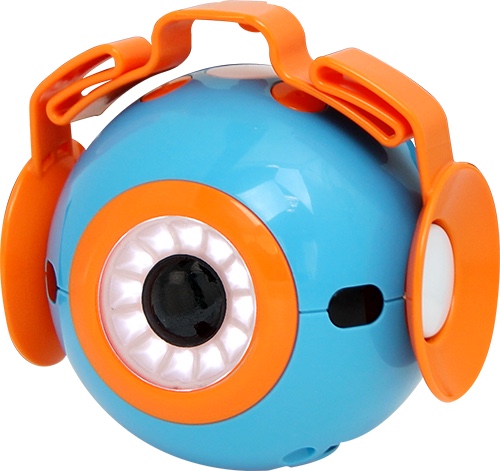
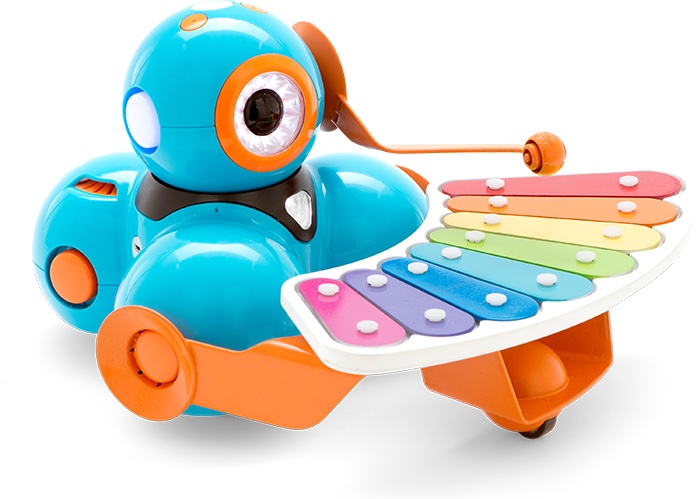
Xylophone
Compose and loop some original tunes or play some old favorites as Dash drives around!
Set up for:
Dash
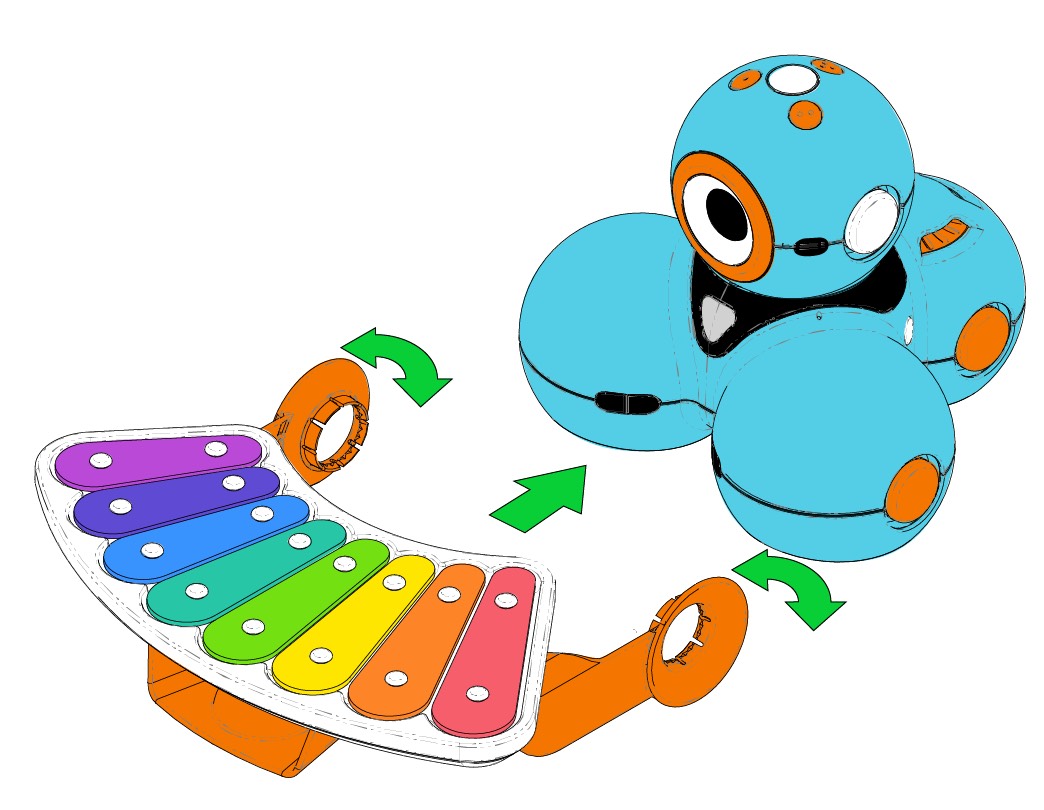
Step 1
Place Dash on a flat surface. Pull the connector rings of the xylophone outward and line them up to the connection points on the sides of Dash’s front wheels.Press firmly to snap the xylophone in place. To make sure the xylophone
is properly aligned, check that its wheel is resting on the ground in front of Dash.
Step 2
Line up the mallet’s connector ring with the connection point on the left side of Dash’s head. (If you are facing the robot, its left is to your right.)
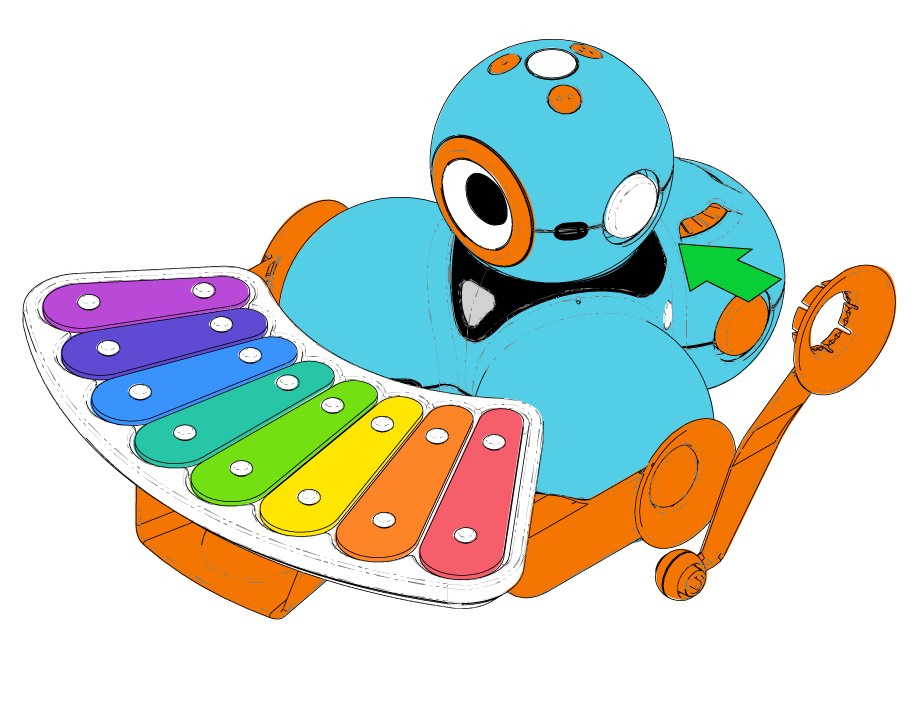
Step 3
Press firmly to snap the mallet into place.
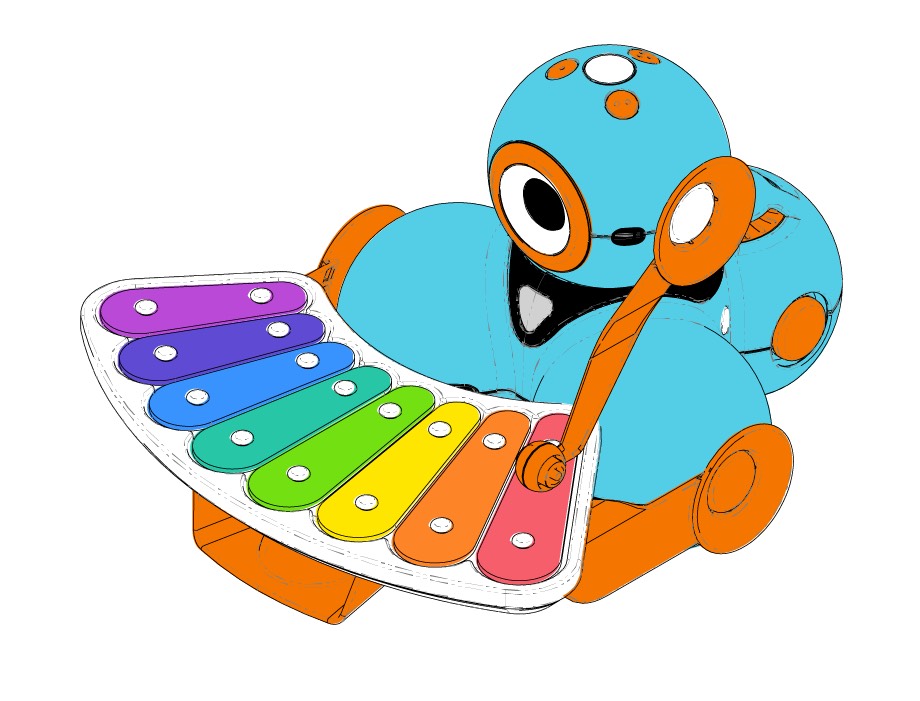
Step 4
To make sure the mallet is properly aligned, check that it is level (pointing straight forward) when Dash’s head and eye are facing straight ahead. Once the xylophone is connected, Dash is ready to play!